
11 One Wall Kitchen Ideas That Maximize Small Spaces Like Magic

Got a teeny kitchen hugging just one wall? Same. The good news: a one-wall layout can punch way above its weight if you play it smart. Let’s turn that sliver of space into a sleek, hard-working showpiece—no demo, no drama, just clever design and a few power moves.
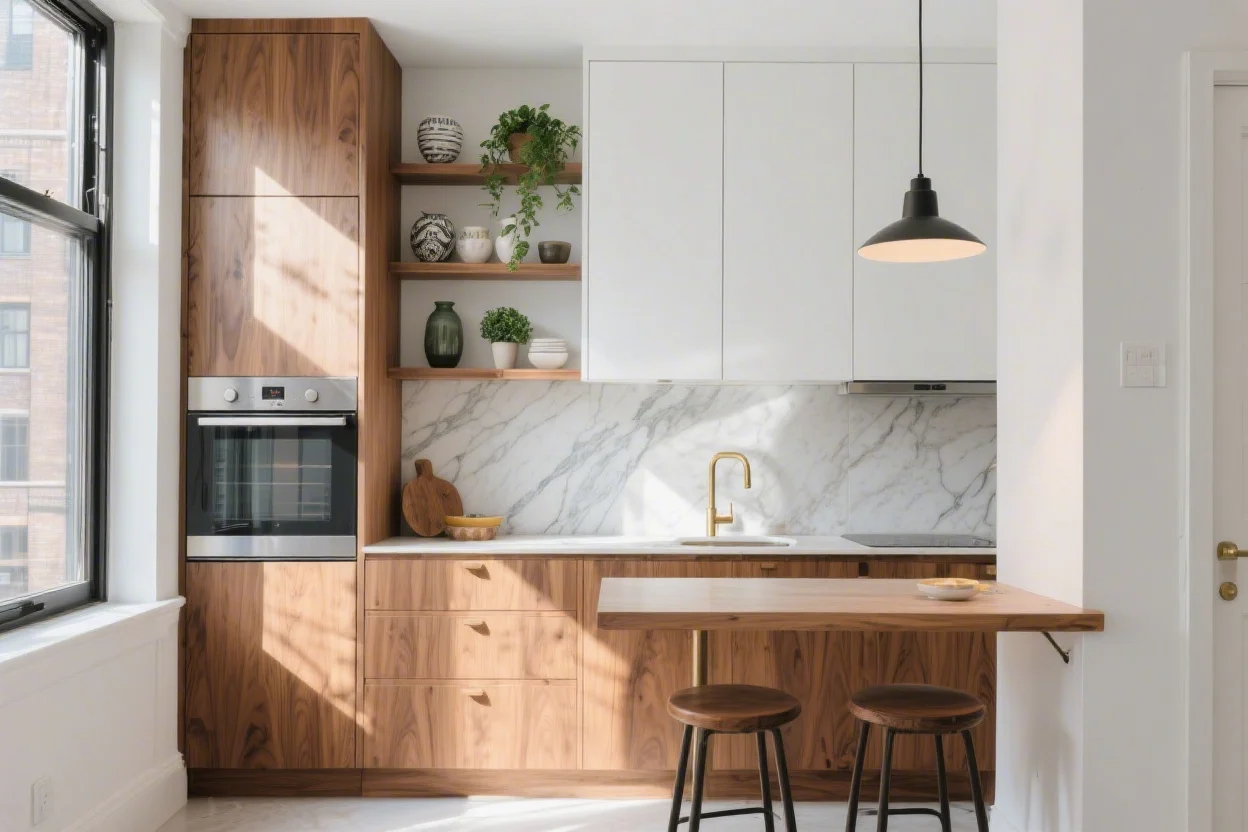
1. Build a Power Strip: The Mini Work Triangle in a Line
© 2025 AI Illustrator — Inspiration Only
A one-wall kitchen doesn’t have a traditional triangle, but you can mimic the flow. Think fridge → prep → sink → cooktop—in that order—from one end to the other. You’ll move less, spill less, and cook more confidently.
How to Lay It Out
- Fridge on one end keeps the cold goods handy and away from heat.
- Prep zone sits between the fridge and sink—park your cutting board here.
- Sink in the middle for easy rinsing and pivoting.
- Cooktop/oven on the far end so steam and splatter don’t ambush your traffic flow.
FYI, if you can swing it, add a dishwasher next to the sink on the prep side for efficiency that feels weirdly luxurious.
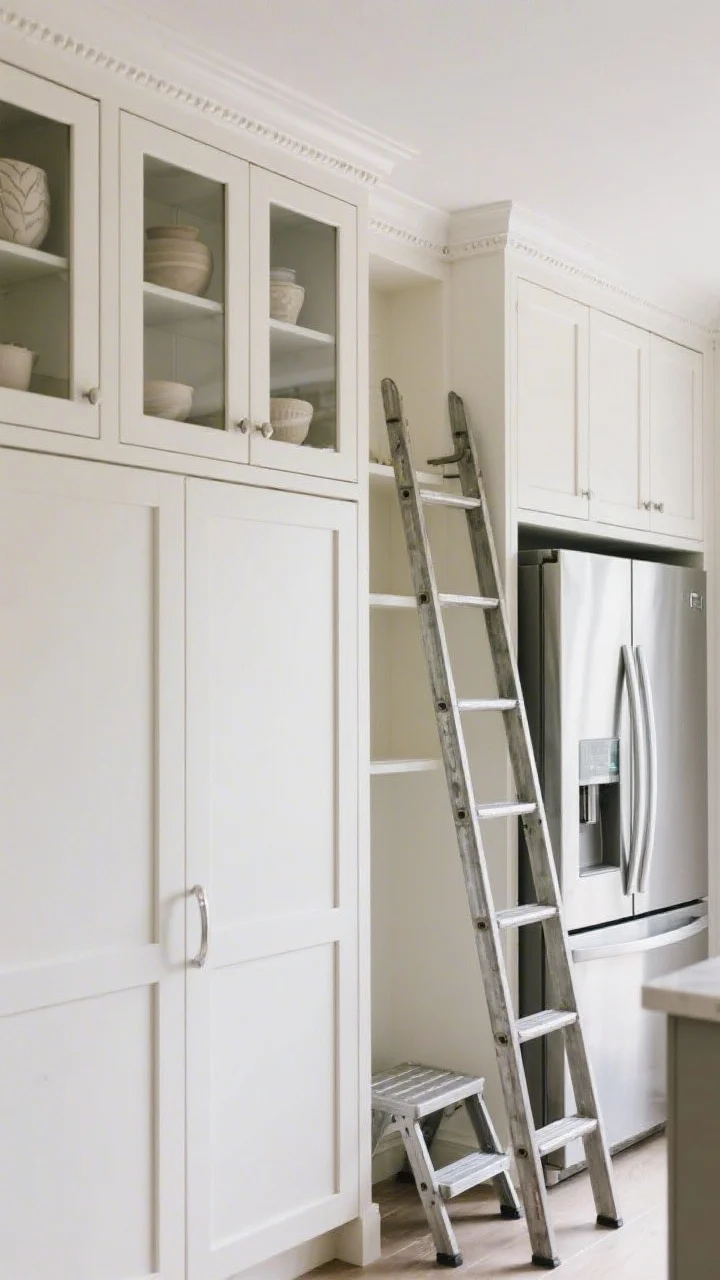
2. Go Vertical: Double-Stacked Uppers Without the Bulk
© 2025 AI Illustrator — Inspiration Only
When floor space is limited, the ceiling becomes your best friend. Install ceiling-height cabinets or a double row of uppers: everyday items at eye level, seasonal stuff up top.
Make It Pretty And Practical
- Glass-front upper doors on the second row create airiness and show off pretty ceramics.
- Library ladder (yes, really) or a slim foldable step stool tucked beside the fridge.
- Matching crown molding to make the cabinetry feel built-in and intentional.
Pro tip: run the uppers all the way across in a continuous line. It looks custom and visually cleans up the wall.
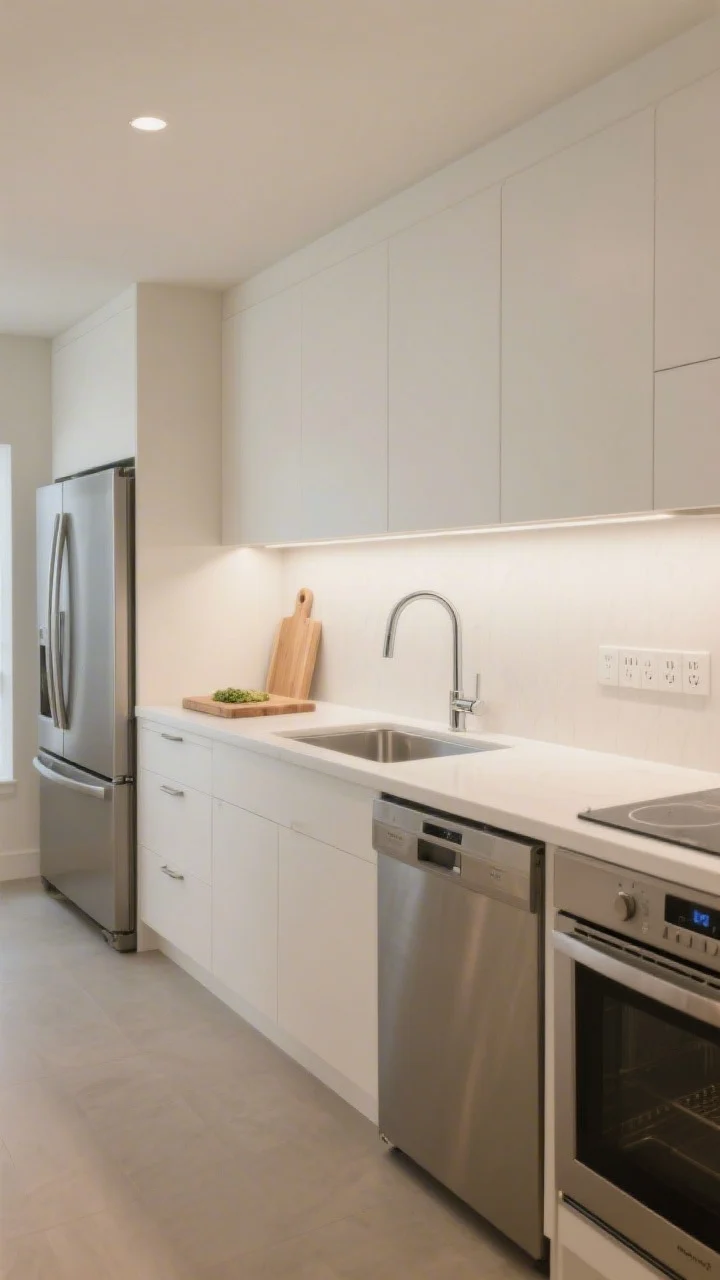
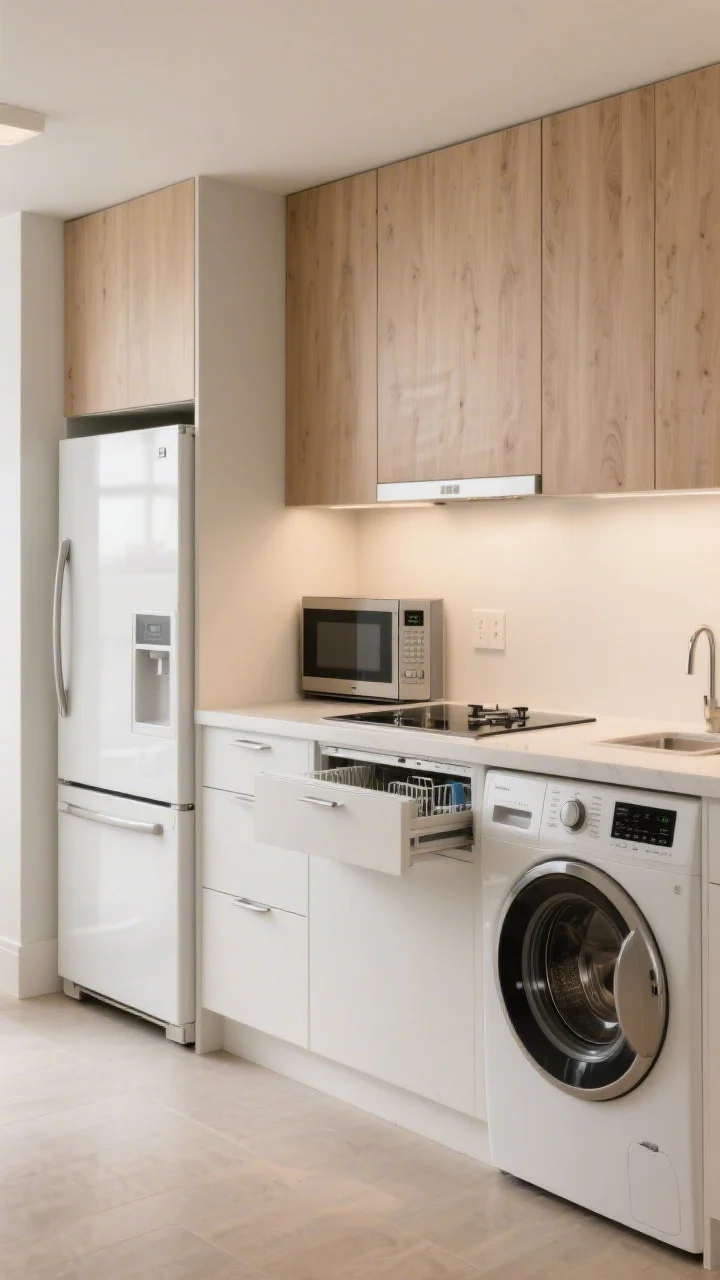
3. Slim Everything: Appliances That Pull Their Weight
© 2025 AI Illustrator — Inspiration Only
Bulky appliances can eat your kitchen alive. Go for counter-depth fridges, 24-inch dishwashers, and 18–24 inch ranges or induction cooktops. You’ll gain inches of prep space that actually matter.
Smart Appliance Choices
- Induction cooktop with low-profile venting for a sleek look and instant heat control.
- Microwave drawer tucked into base cabinets to free the counter.
- Washer-dryer combo hidden behind a panel (city living hack).
And if you can, integrate appliances with cabinet panels—everything reads like one gorgeous wall, not a lineup of boxes.
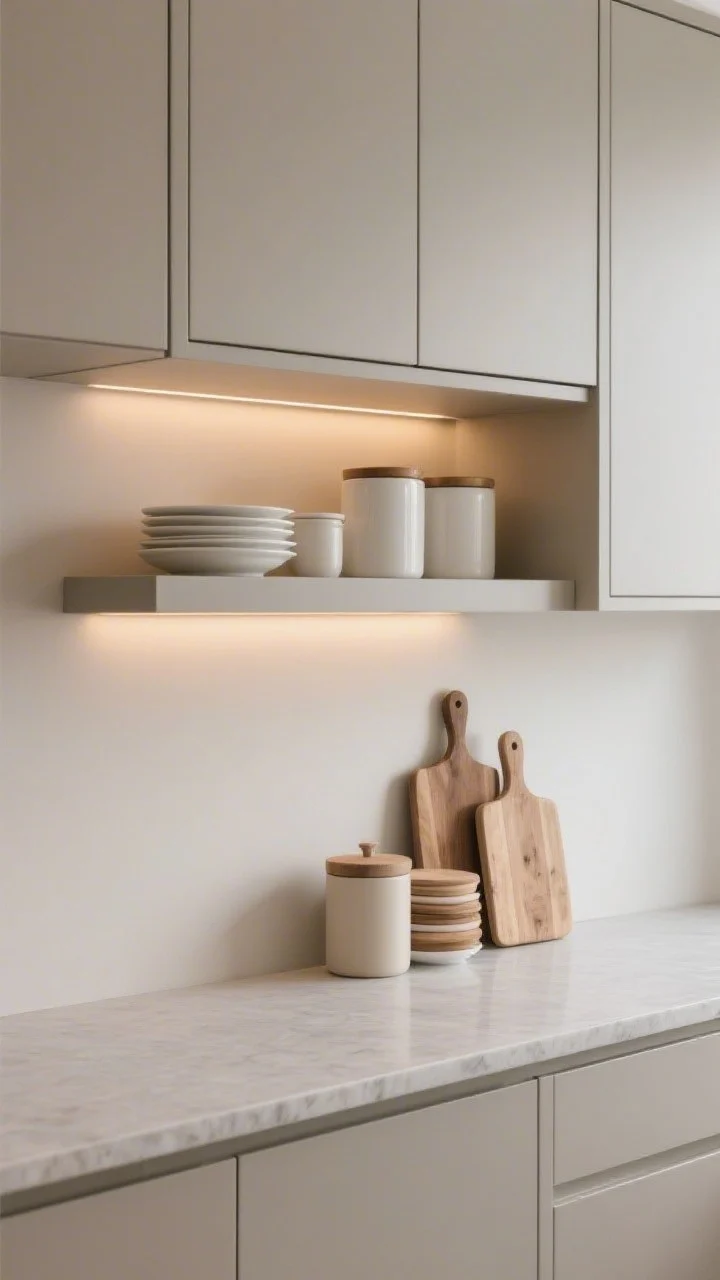
4. The Floating Shelf + Closed Storage Combo
© 2025 AI Illustrator — Inspiration Only
Open shelves alone can look messy. The trick is a hybrid approach: a couple of streamlined open shelves for everyday mugs and bowls, then closed cabinets for the chaos.
Styling That Works Hard
- Keep open shelves to 1–2 tiers max, aligned neatly over the counter.
- Style by color and material: white dishes, wood cutting boards, neutral canisters.
- Undershelf lighting keeps shadows away and gives a boutique glow.
Bonus: a small lip on the shelf edge stops jars from taking a leap during late-night snack runs.
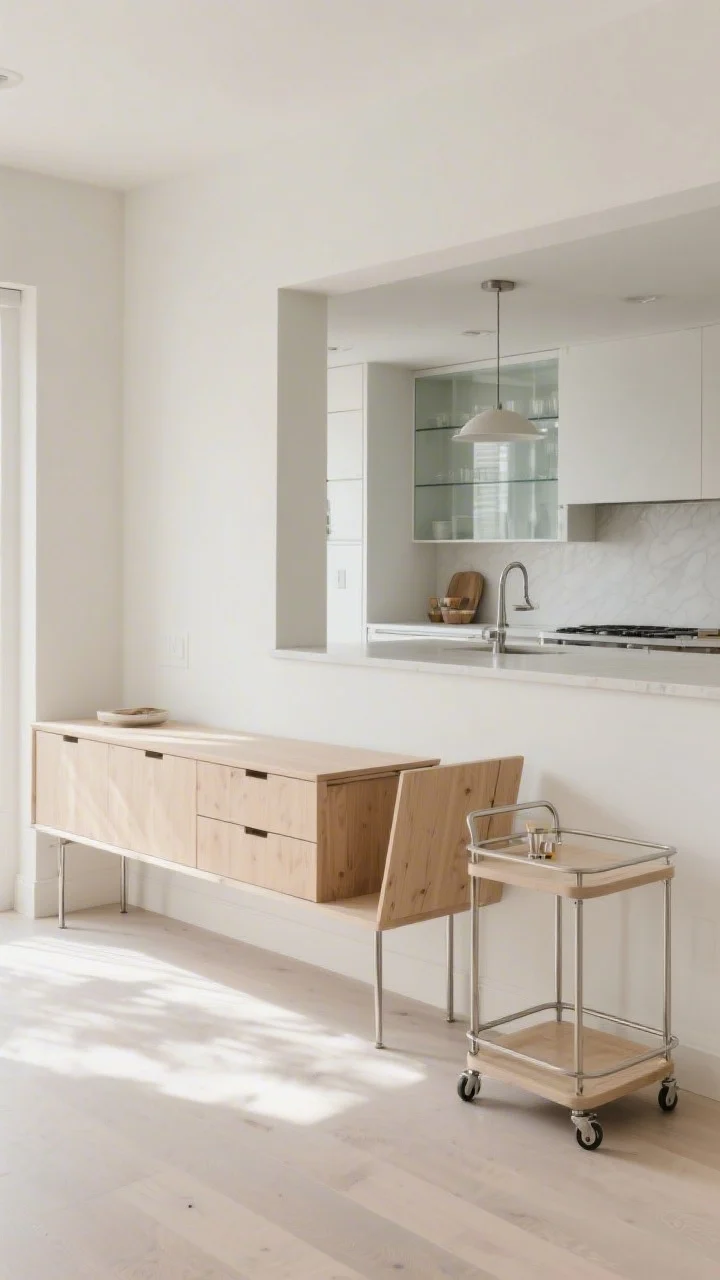
5. Add a Slimline Island or Console (Yes, Even Here)
© 2025 AI Illustrator — Inspiration Only
If you’ve got 30–36 inches of clearance, consider a slim island, console, or bar cart opposite the wall. It’s extra prep space, storage, and a dining perch all in one.
What to Look For
- 24-inch deep console with drawers for utensils and linens.
- Drop-leaf table that folds down when you need room to move.
- Mobile kitchen cart with locking wheels for flexible floor plans.
Keep finishes light or transparent—glass, slender metal legs, or pale wood won’t visually crowd the room.
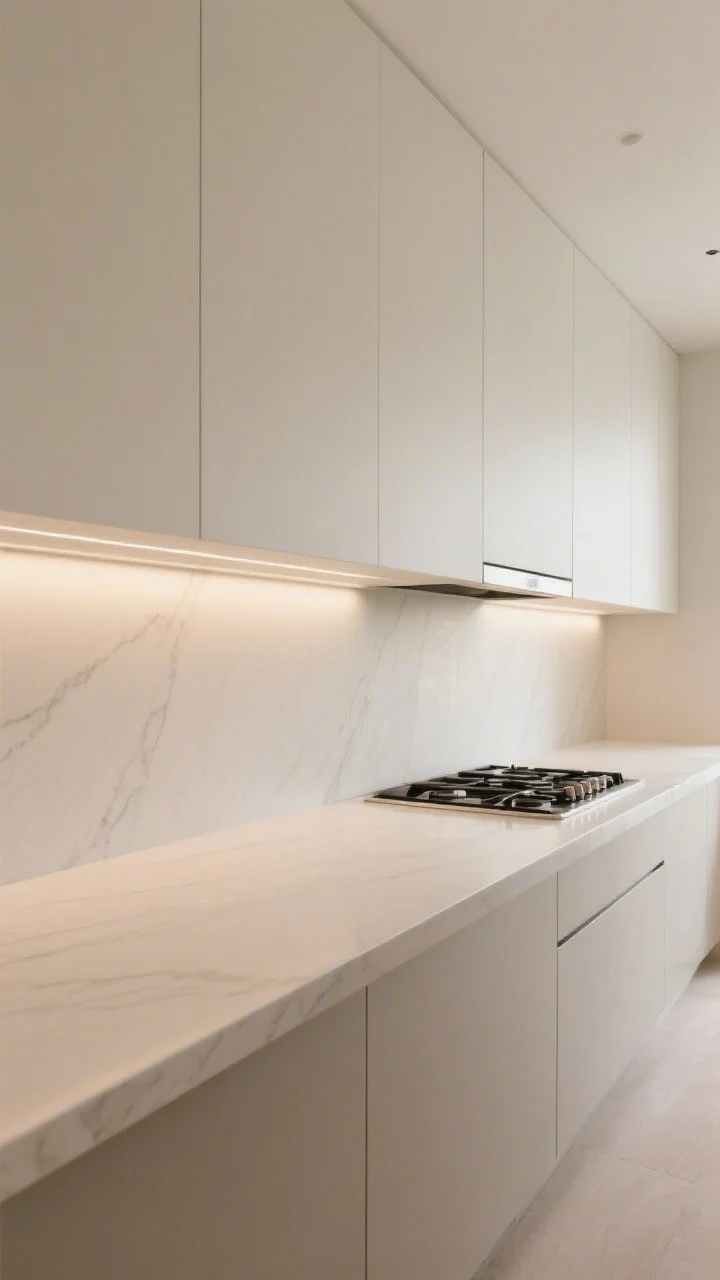
6. Unbroken Lines: Counters, Backsplashes, and Color Blocking
© 2025 AI Illustrator — Inspiration Only
Here’s the design flex: one continuous counter and backsplash makes a small kitchen feel twice as big. Choose a slab backsplash or matching material that runs the length of the wall—no choppy seams if you can help it.
Color and Finish Tips
- Monochrome palette (think creamy white or soft greige) for a seamless vibe.
- Matte finishes hide fingerprints; eggshell paint is easy-clean for walls.
- Waterfall edge on one side of the counter for a luxe detail that frames the zone.
Want a little drama? Run the backsplash to the ceiling behind the hood. It’s a “wow” moment that steals zero floor space.
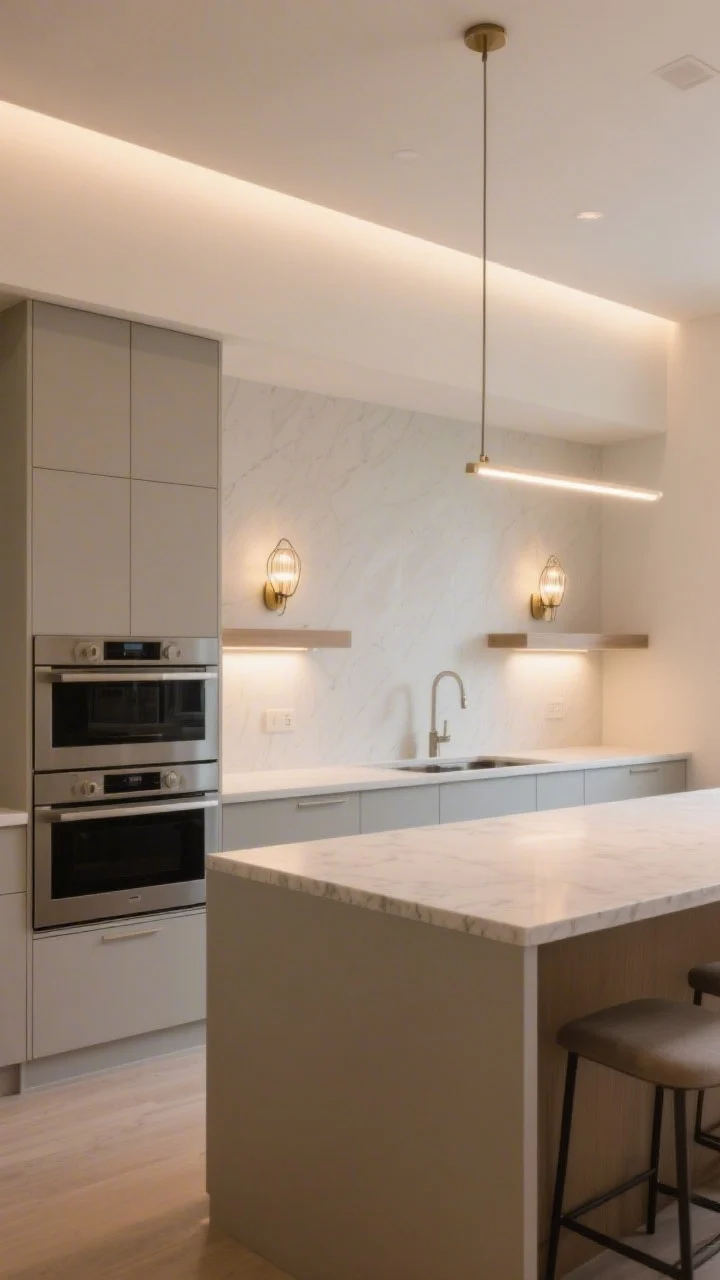
7. Lighting Layers That Make Everything Look Designer
© 2025 AI Illustrator — Inspiration Only
Flat light = flat space. Layer your lighting like a pro with task, ambient, and accent fixtures so your single wall glows from every angle.
Bright Ideas
- Under-cabinet LEDs for chopping without shadows.
- Statement sconce or two flanking the range or open shelves for personality.
- Linear pendant over a slim island to visually anchor the zone.
Use warm-white bulbs (2700–3000K) for cozy, flattering light that makes dinner look delicious—even if it’s just boxed pasta, IMO.
8. Hidden Storage: Toe Kicks, End Panels, and Inside-the-Door Magic
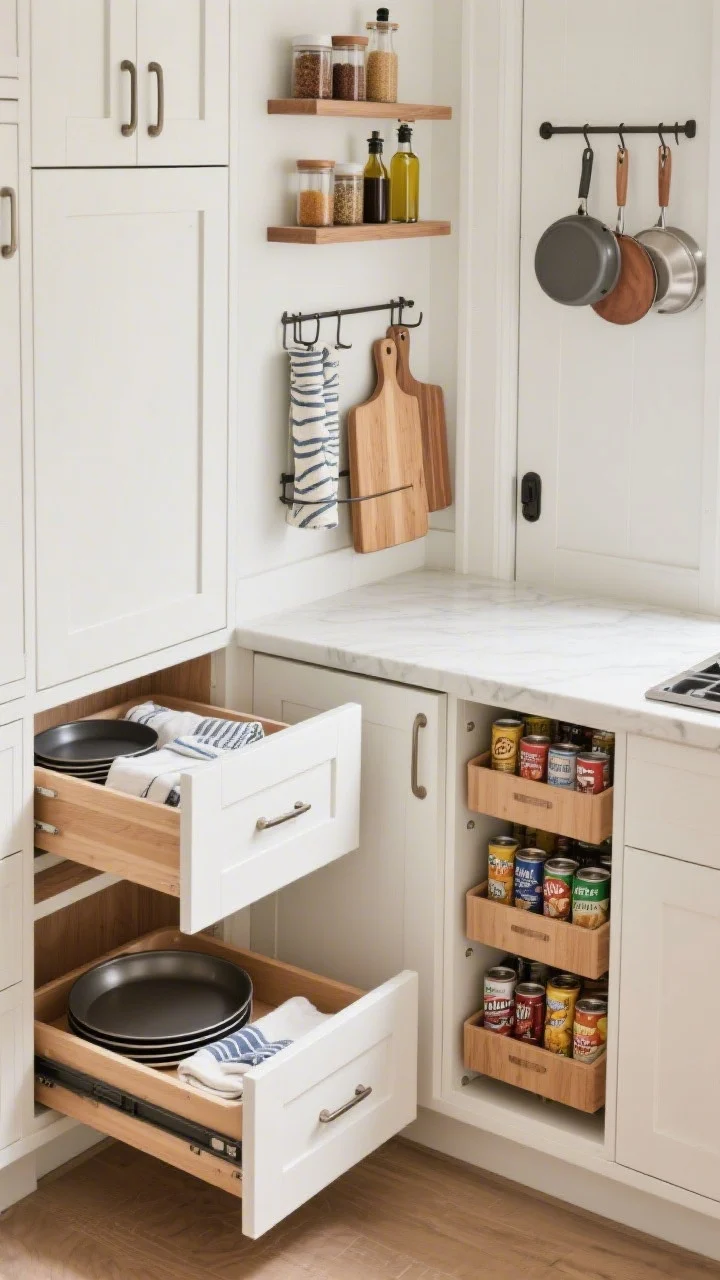
© 2025 AI Illustrator — Inspiration Only
Every inch counts. Tap into the secret spaces that standard kitchens ignore and hide storage in plain sight.
Where to Stash More
- Toe-kick drawers for flat pans, boards, and spare linens.
- Cabinet end panels with shallow shelves for spices, oils, and cookbooks.
- Back-of-door racks for wraps, cutting boards, and pot lids.
- Pull-out pantry in a 12–15 inch gap—hello, cans and snacks.
Consider drawer organizers that fit like a glove—no more rummaging, just instant-access calm.
9. Mix Materials for Depth (Without Visual Chaos)
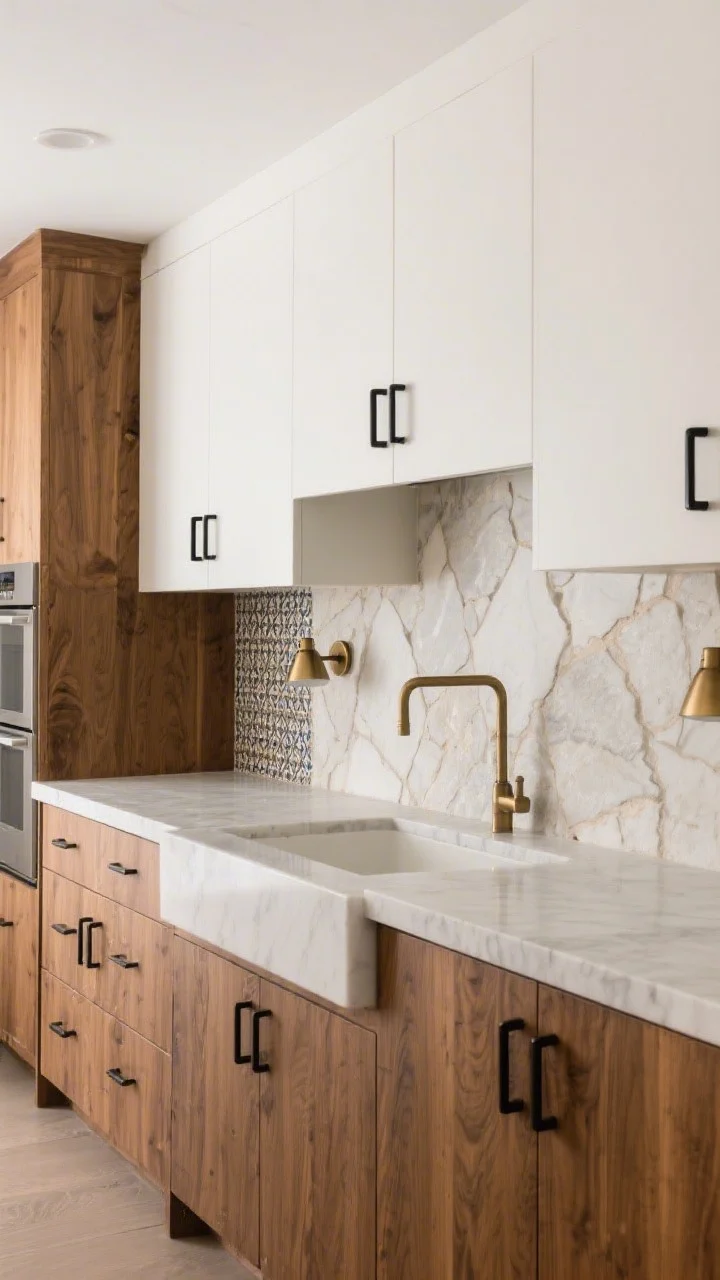
© 2025 AI Illustrator — Inspiration Only
A single-wall kitchen can look flat if everything matches too much. Layer in two to three complementary materials for dimension—then stop. Editing is your friend.
Foolproof Combos
- Warm wood lowers + painted uppers + stone slab backsplash.
- Matte black hardware + brushed brass sconces for a curated, collected look.
- Textured tile (zellige or handmade look) + smooth quartz counters.
Keep the palette tight: repeat each material at least twice so it feels intentional, not random.
10. Add Rhythm With Repetition: Lines, Handles, and Tile
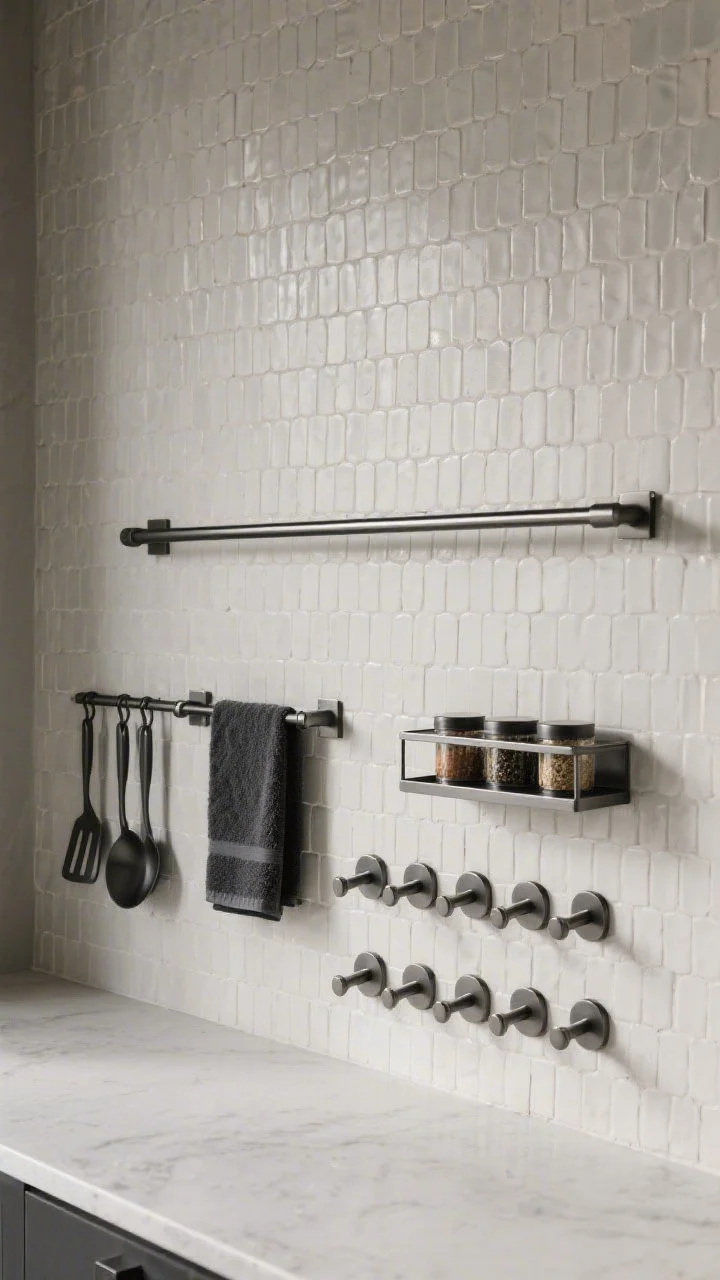
© 2025 AI Illustrator — Inspiration Only
In compact spaces, repetition = harmony. Repeating shapes and lines guides the eye smoothly across the wall so everything feels cohesive.
Easy Wins
- Match hardware styles across drawers and doors—same finish, similar scale.
- Use linear elements: a rail for utensils, a rod for towels, a slim shelf for spice jars.
- Consistent tile pattern (stacked or herringbone) that runs end-to-end, no random transitions.
Think of it like a playlist. If every song is a different genre, your brain gets tired. Keep the beat steady.
11. Make It Social: Breakfast Ledge, Pocket Table, Or Window Bar
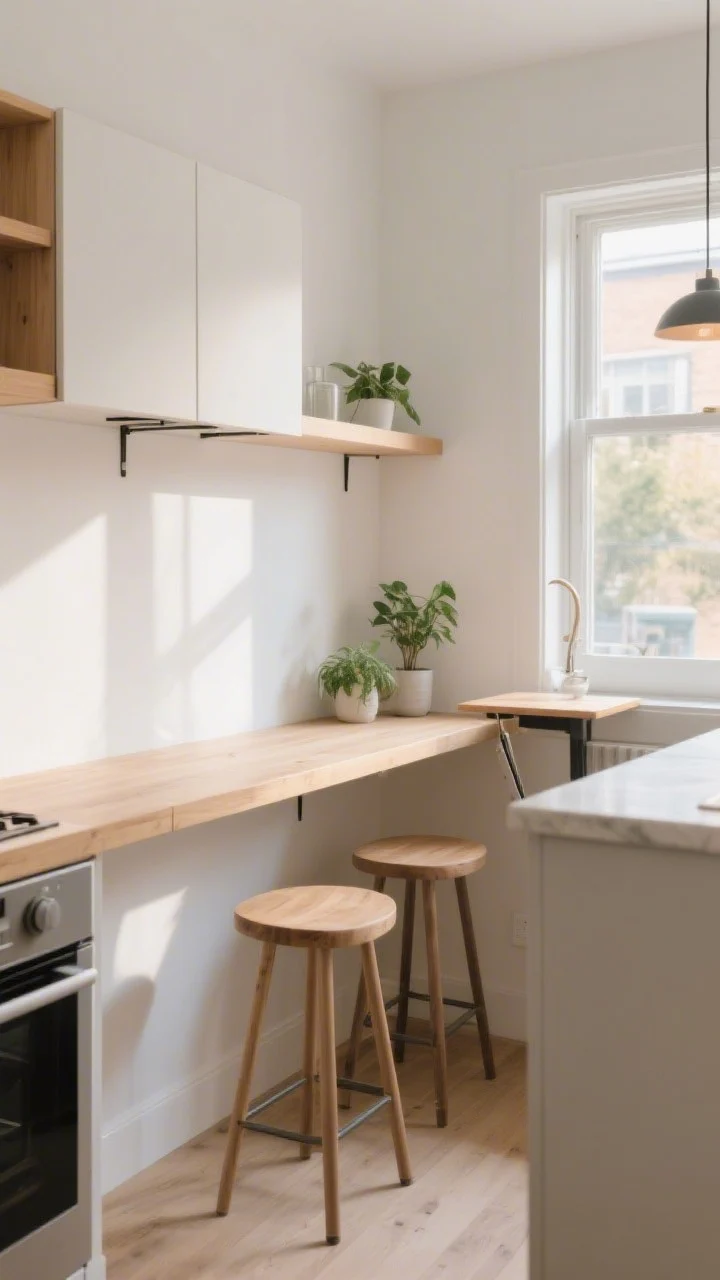
© 2025 AI Illustrator — Inspiration Only
Just because your kitchen is on one wall doesn’t mean it can’t be a hangout. Add a perch—somewhere to sip coffee, answer emails, or chat with the cook.
Space-Savvy Seating Ideas
- Wall-mounted breakfast ledge with two stools tucked underneath.
- Flip-down table that disappears when you need a yoga mat moment.
- Window bar for the sunlit cafe vibe (plants optional but encouraged).
Choose backless stools that slide under the counter and keep traffic flowing. Suddenly, your one-wall kitchen is also your favorite coffee shop—minus the line.
Bonus Styling Tips to Pull It All Together
- Color code your containers and decant pantry items for a cleaner look.
- One runner rug down the length to anchor the zone and add warmth (washable is a lifesaver).
- Greenery: a trailing pothos or herb pots to soften all the straight lines.
- Minimal counter clutter: keep out one pretty cutting board, a tidy utensil crock, and a statement kettle—everything else earns a drawer.
Sample Layouts To Steal
- Studio Chic: 24″ fridge panel-ready → 24″ base drawer stack (prep) → 24″ sink base → 24″ dishwasher → 24″ induction range. Uppers across entire wall with one open-shelf bay above the prep zone.
- Entertainer’s Lineup: Full-height pantry pull-out → 30″ counter-depth fridge → 30″ sink base with pull-out trash → 36″ drawers with cooktop → 24″ oven stack. Floating shelf over prep, slab backsplash behind cooktop.
- Rental Refresh: Keep cabinets, add peel-and-stick slab-look backsplash, under-cabinet puck lights, matte black hardware, and a narrow console as a pseudo-island. Instant glow-up.
Materials And Finishes That Love Small Spaces
- Quartz or porcelain slab for low-maintenance counters and a unified look.
- Light oak or ash for warmth without weight; avoid super-red woods that dominate.
- Soft whites, clay neutrals, sage greens for a calm base that won’t crowd the eye.
- Hardware: slim bar pulls or petite knobs in matte black, brushed nickel, or warm brass—pick one finish and commit.
Quick Measurements Cheat Sheet
- Counter depth: 24–25 inches standard; keep consistent for smooth lines.
- Upper cabinet height: 36–42 inches; stop 1–2 inches from the ceiling or go full height with filler for a custom look.
- Clearance for island/console: Minimum 30 inches; 36 is comfy.
- Open shelf depth: 8–10 inches (mugs, bowls) or 10–12 inches (plates, canisters).
Maintenance Moves (Because You Actually Live Here)
- Integrated trash and recycling under the sink or in a pull-out next to it—clutter disappears.
- Charging drawer for devices so cords don’t sprawl across precious counter space.
- Tray systems inside cabinets to corral oils and condiments—wipe the tray, not the shelf.
Ready for the best part? A one-wall kitchen forces focus. Every choice matters—which means every win is bigger. Lean into clean lines, hidden storage, and smart lighting, sprinkle in a little personality, and watch your “tiny” kitchen act like the main character. You’ve got this. FYI, your takeout is about to get a stunning new backdrop.