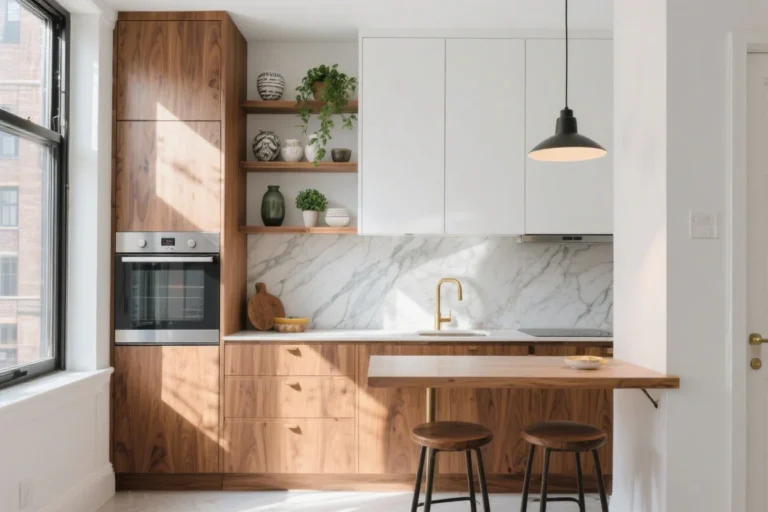
8 Open Kitchen Shelving Ideas That Don’t Look Messy (even on Busy Days)

Open shelves can look dreamy… or like a yard sale exploded in your kitchen. The difference? Smart styling and a few pro tricks. If you love the airy, magazine-cover vibe but hate visual chaos, let’s make your shelves look curated, not cluttered. Ready to level up?
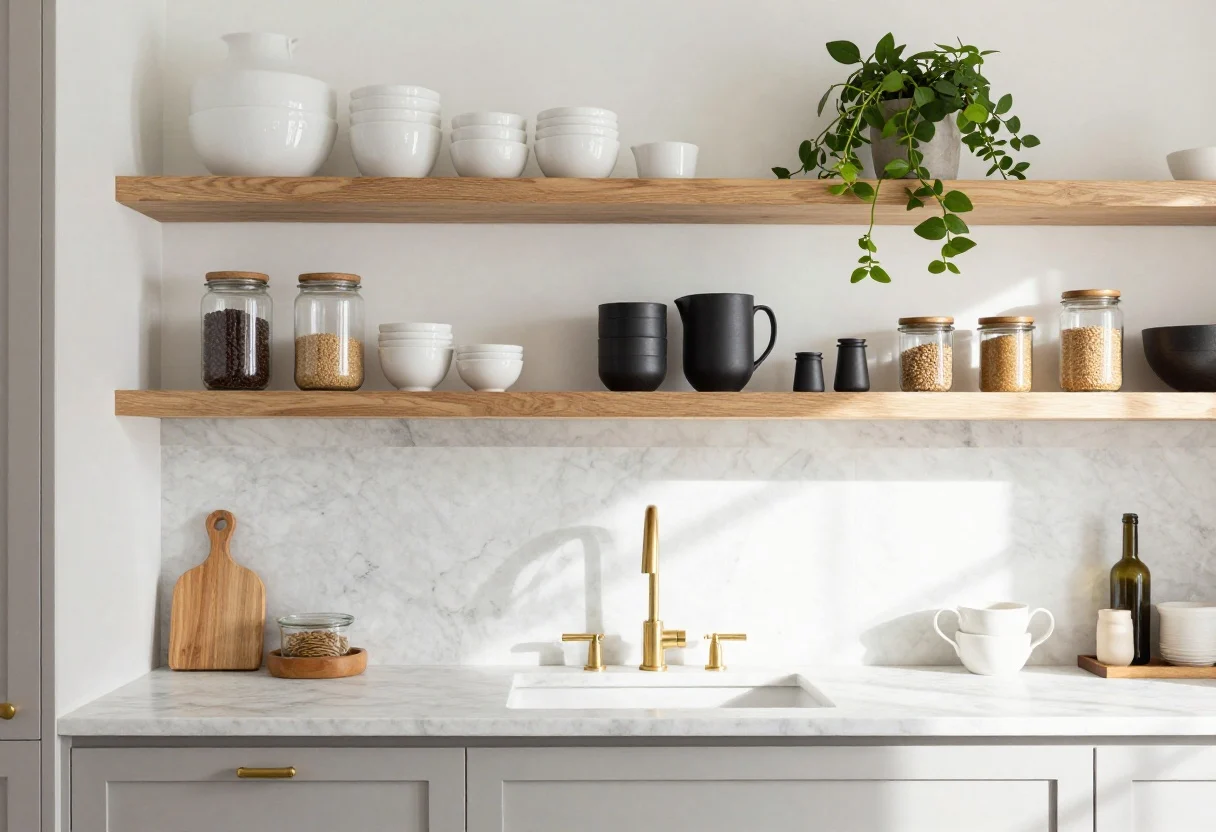
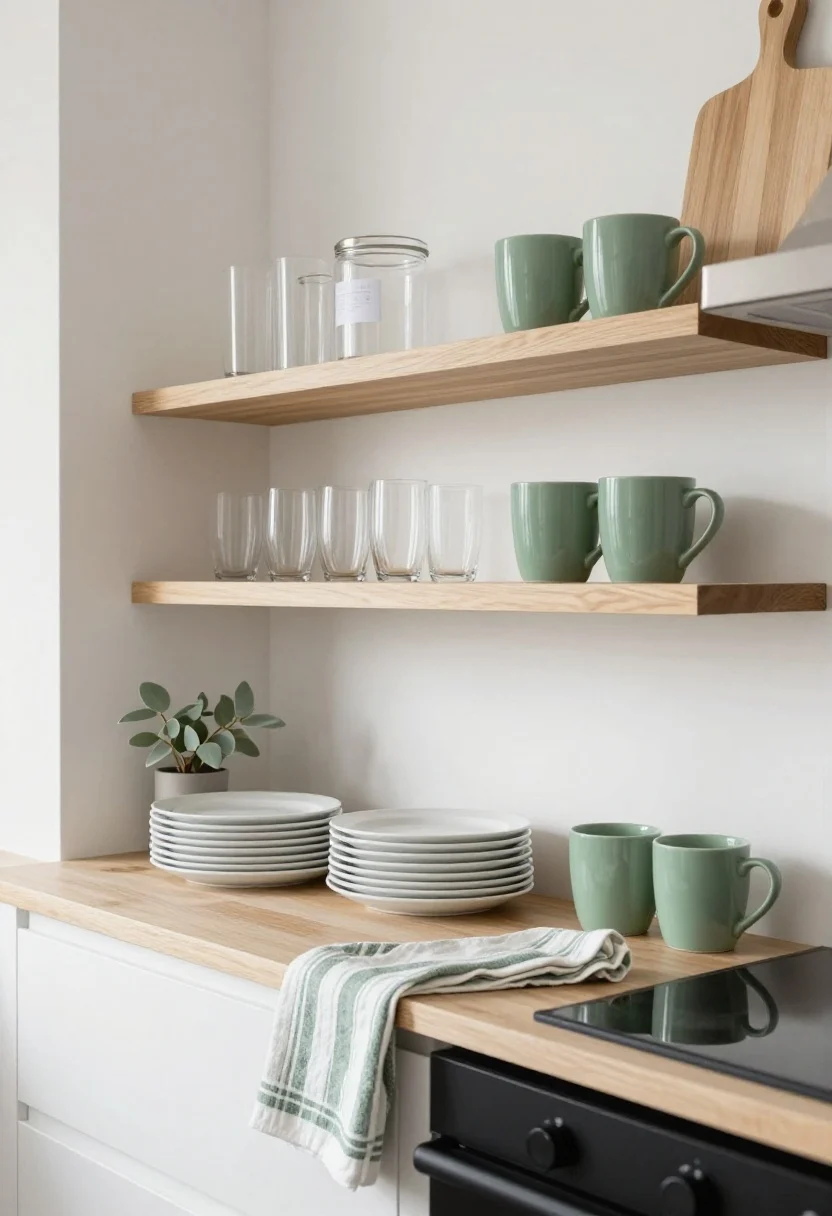
1. Curate A Color Story (And Stick To It)
© 2025 AI Illustrator — Inspiration Only
Color is your secret weapon for calm. Choose a tight palette—think 3-4 colors max—and let everything on your shelves fall in line. Neutrals plus one accent works wonders: white, wood, black, and a hit of sage? Chef’s kiss.
How To Pull It Together
- Unify everyday pieces: white plates, clear glasses, light wood boards.
- Repeat hues in groups: two green mugs + a small plant + a green-striped towel.
- Hide the chaos in opaque containers so labels don’t scream at you.
FYI: A consistent palette reads tidy even if you have a lot of items. It’s visual discipline, not minimalism.
What to shop for: ceramic dinnerware, clear glassware sets, stoneware canisters, cotton napkins.
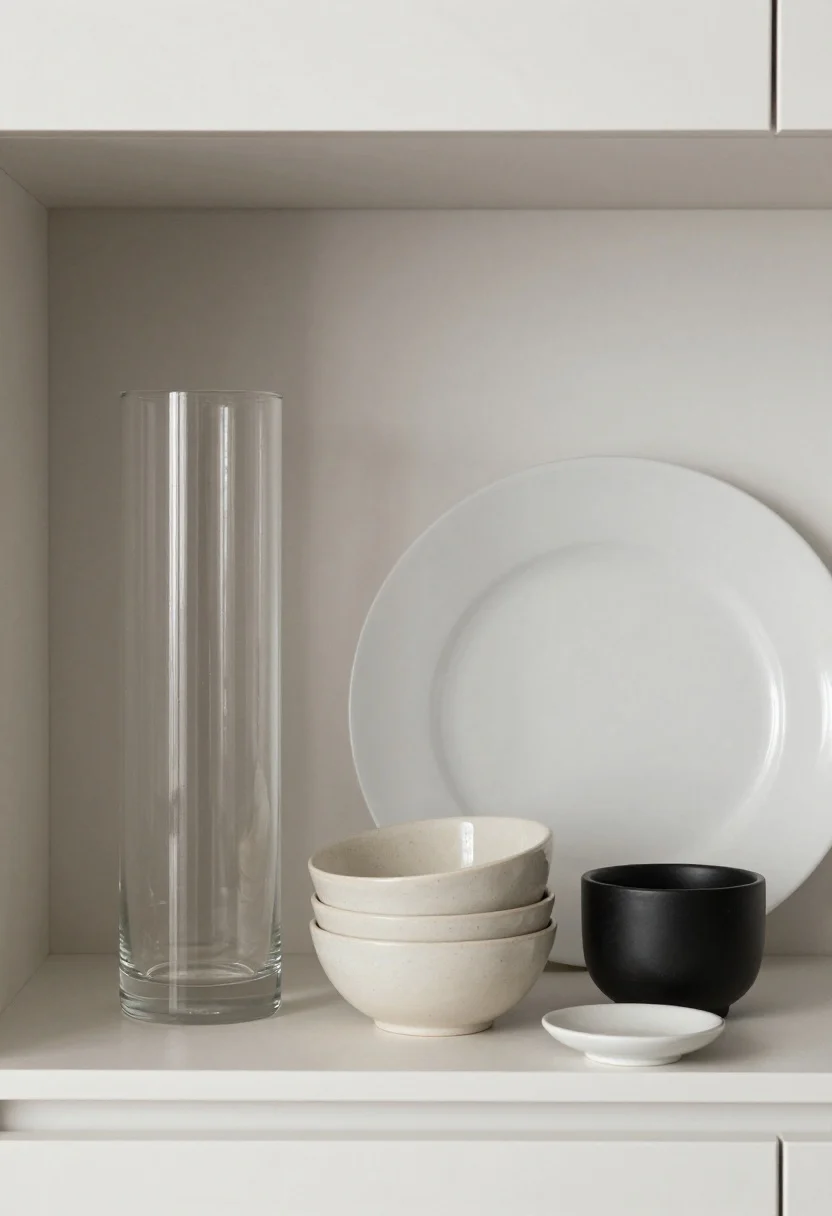
2. Style In Trios And Stacks (The Rule Of Three)
© 2025 AI Illustrator — Inspiration Only
The fastest path to shelves that feel styled (not stuffed) is grouping. Odd numbers—especially threes—look intentional. Think a stack of bowls, a small vase, and a salt cellar. Done.
Pro Moves
- Vary height + shape: a tall carafe, medium bowl stack, low dish.
- Layer front-to-back to add depth—plate at the back, bowl in front, tiny accent forward.
- Leave breathing room at the ends of shelves. Negative space is part of the look.
Don’t overthink it. Arrange, step back, remove one thing. Almost always better.
What to shop for: nesting bowls, carafes, petite vases, pinch bowls.
3. Mix Closed Bins With Open Display
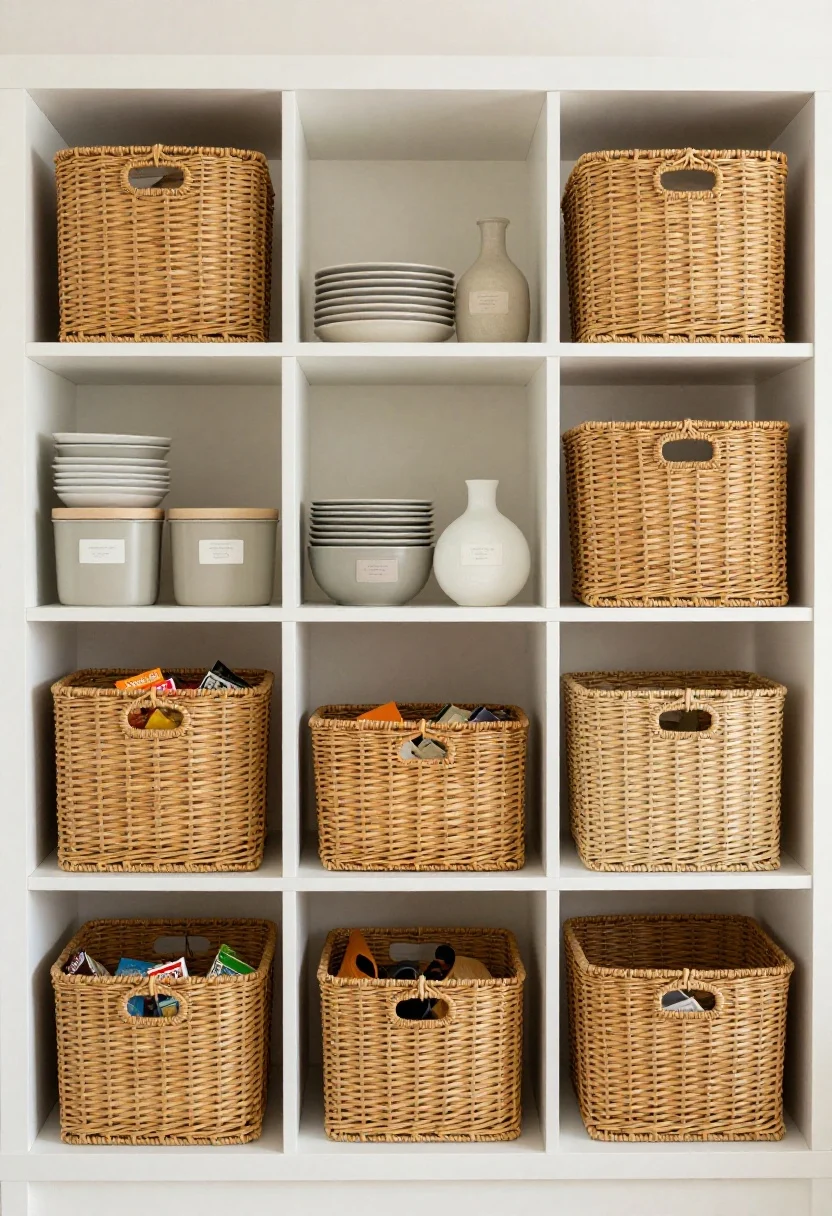
© 2025 AI Illustrator — Inspiration Only
Some things are just not pretty. Potato chips, mismatched sippy cups, your emergency ramen stash—love them, don’t show them. Balance open display with closed storage so your shelves work hard and still look clean.
Smart Containment
- Opaque baskets or lidded bins for snacks, medicine, or random tools.
- Label discreetly (small tag or tone-on-tone label) so it’s functional without visual noise.
- Stash heavy-use items at arm’s reach; pretties go at eye level.
IMO, every open shelf plan needs at least one basket per shelf. It’s the neat-freak cheat code.
What to shop for: woven baskets, matte canisters, lidded storage jars.
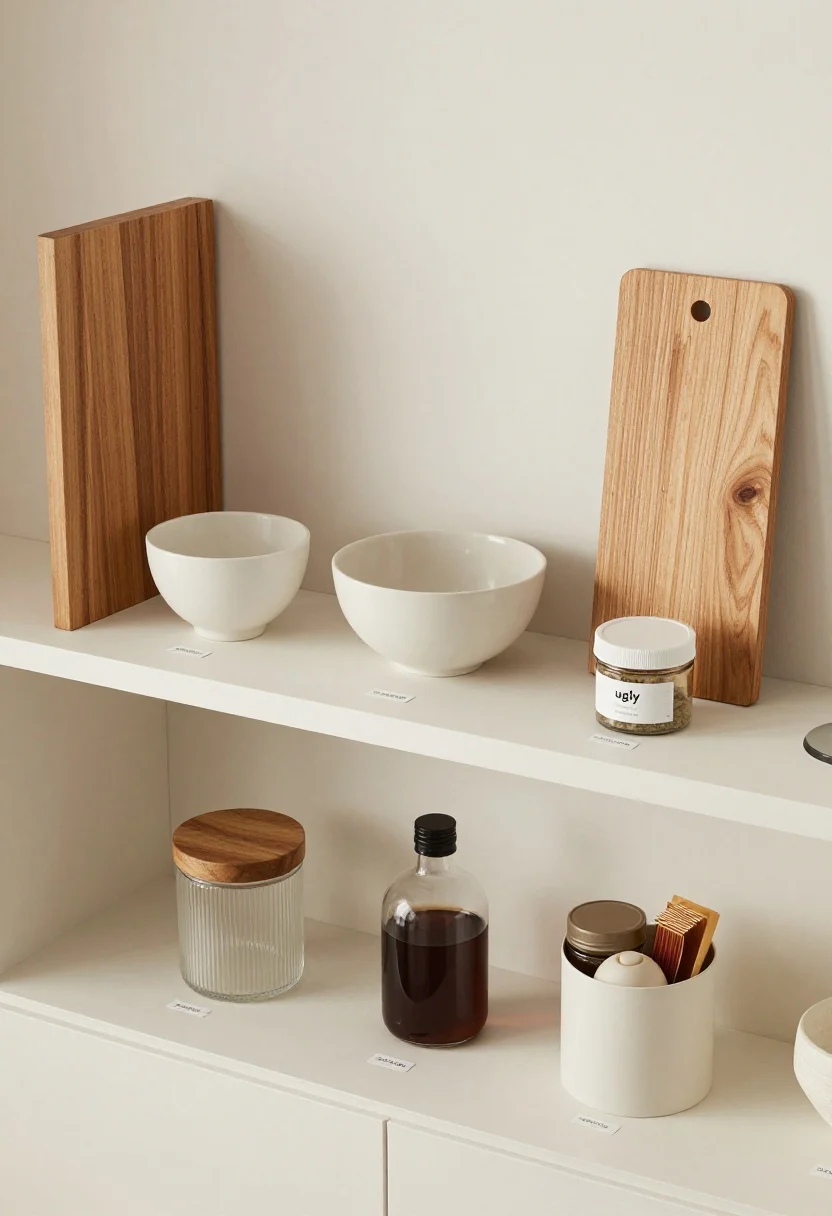
4. Play With Texture, Not Just Color
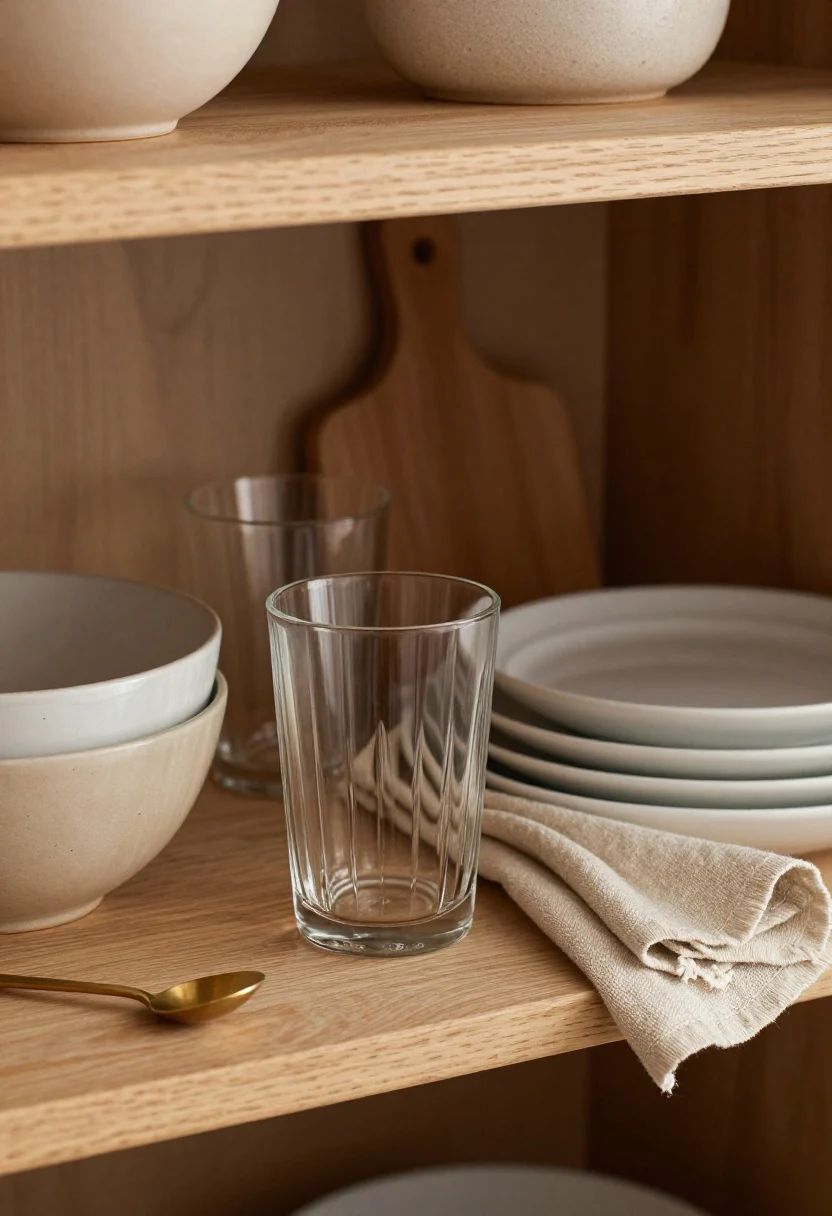
© 2025 AI Illustrator — Inspiration Only
When everything matches too perfectly, shelves can feel flat. Layer texture—wood, matte ceramic, glass, linen—to add dimension without adding clutter. It’s the “quiet luxury” of kitchens.
Texture Combo Ideas
- Wood + matte stoneware for warmth and softness.
- Ribbed or fluted glass for subtle shine that still looks calm.
- Linen tea towels draped neatly over a stack of plates for a styled-but-useful touch.
One shiny thing per shelf is plenty. Polished metals? Keep them minimal so they don’t outshine the food—literally.
5. Use Books And Art Like A Designer
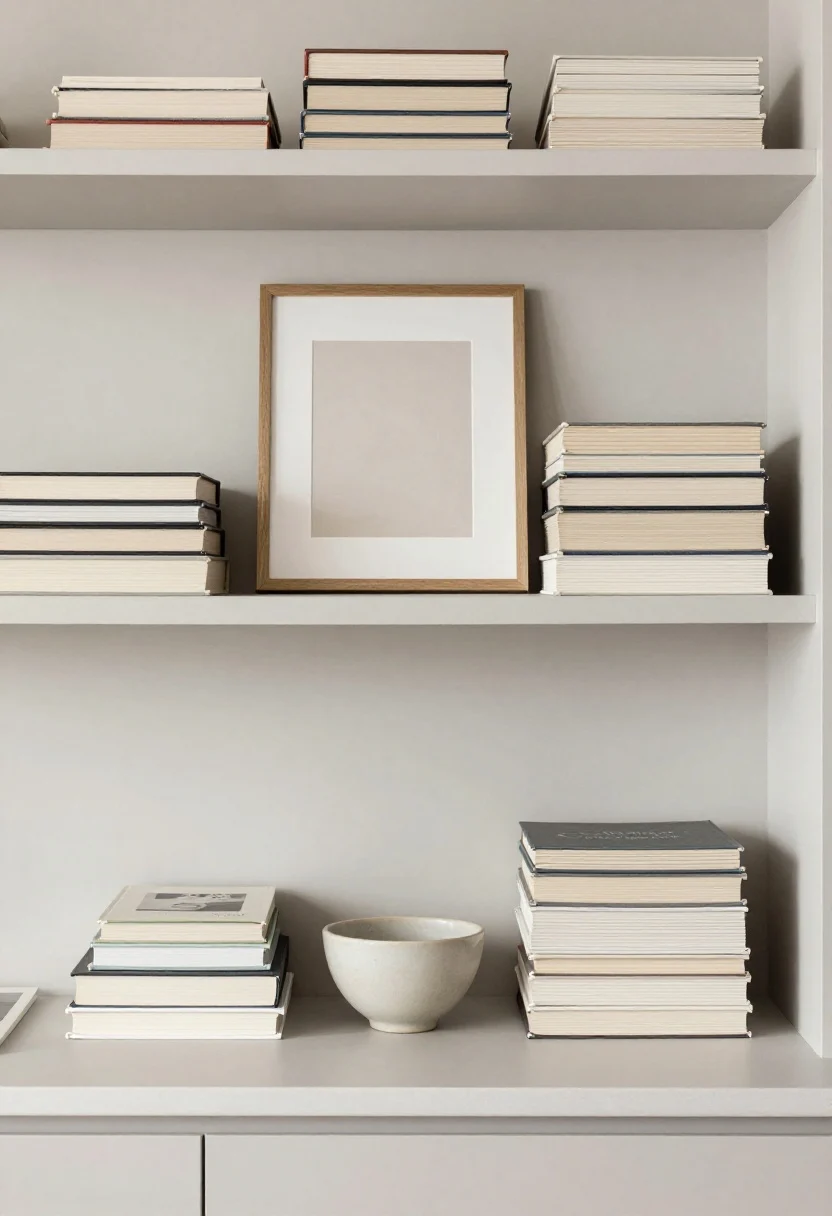
© 2025 AI Illustrator — Inspiration Only
Yes, on kitchen shelves. A slim framed print or a mini stack of cookbooks adds personality and makes everything feel curated, not like you just unpacked boxes and called it a day.
How To Add Personality Without Clutter
- Lean a small artwork behind your everyday stack to anchor the vignette.
- Stack 2-4 cookbooks horizontally as a pedestal for a pretty bowl or candle.
- Keep spines tonal—neutrals or your chosen accent color for visual calm.
Pro tip: Frame a recipe card from a grandparent. Instant warmth, zero kitsch.
What to shop for: slim frames, neutral cookbooks, candle holders.
6. Decant The Visual Noise
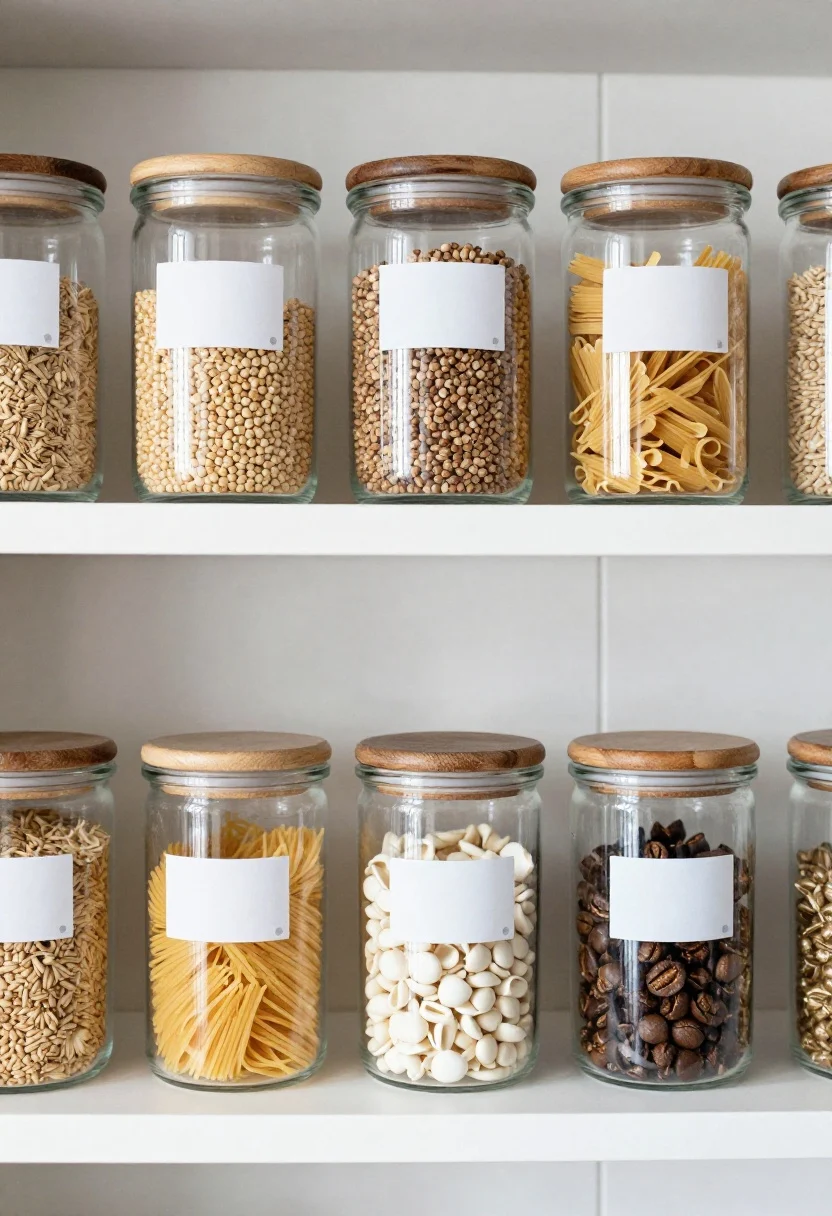
© 2025 AI Illustrator — Inspiration Only
Packaging is loud. Transfer pantry basics into clear or matte canisters and you’ll cut 80% of the chaos instantly. Bonus: you’ll actually know when you’re low on rice before it ruins dinner plans.
Decanting Do’s
- Match lids (all wood, all black, etc.) for cohesion.
- Label tiny—discreet dots or minimal script to avoid busy visuals.
- Group by type: grains together, baking together, snacks together.
And please, don’t decant potato chips. They’ll go stale and make you cranky.
What to shop for: glass canisters, airtight jars, minimalist labels.
7. Balance Symmetry With Asymmetry
Perfect symmetry can feel stiff; total randomness looks messy. The sweet spot? Weighted balance. Mirror the visual weight, not the exact objects, from shelf to shelf.
Layout That Works Every Time
- Top shelf: lighter items (glassware, small bowls, a short plant).
- Middle shelf: your hero moment (stacked plates, art, a statement vase).
- Bottom shelf: heavier pieces (serving platters, cutting boards).
Think seesaw: if one side has a tall vase, balance the other side with a stack of books plus a medium bowl. Not twins—just equals.
8. Keep It Real: Style What You Actually Use
The best-looking shelves are the ones you don’t have to baby. Put daily-use items front and center so styling and function aren’t fighting. If you cook every night, let that show—neatly.
Everyday Systems That Stay Tidy
- Designate zones: coffee station, baking basics, nightly dinnerware.
- Use trays to corral oils, vinegars, and salt—easy to wipe, looks intentional.
- Refresh monthly: quick edit, wipe shelves, re-home the randoms.
It’s not about perfection. It’s about a system that survives Tuesday night pasta.
What to shop for: turntables, low trays, handled caddies, microfiber cloths.
Quick Styling Checklist
- Pick a palette (3-4 colors) and commit.
- Group in threes and vary heights.
- Invite texture: wood, matte ceramic, glass, linen.
- Hide the ugly in bins; decant the rest.
- Balance the overall picture, not each shelf identically.
- Keep daily items accessible and styled.
Common Mistakes To Avoid
- Too many tiny items—they read as clutter. Scale up where possible.
- Label chaos—mismatched fonts and sizes kill the vibe.
- No negative space—if every inch is filled, nothing stands out.
Conclusion
© 2025 AI Illustrator — Inspiration Only
Open shelving doesn’t have to mean open-season clutter. With a tight color story, a few stealth storage moves, and some designer-approved styling tricks, your kitchen can look effortless and stay actually useful. Start small—one shelf at a time—and edit as you live with it. Your morning coffee ritual is about to get a lot prettier.
FAQ
© 2025 AI Illustrator — Inspiration Only
How do I keep open shelves clean?
Dust monthly and wipe down with a damp cloth. Use trays or boards under oils and spices to catch splatters so you’re cleaning the tray, not the shelf.
What should never go on open shelves?
Anything you rarely use, heavy small appliances, or ultra-bright packaging. If it’s ugly or greasy-prone, hide it in a cabinet or bin.
How much space should I leave between items?
Aim for a couple inches on both sides of a grouping and 3-4 inches of open space at shelf ends. If it feels crowded, remove one piece—instant relief.
Shop the Look on Amazon
Disclosure: As an Amazon Associate, this site may earn from qualifying purchases.
These product categories fit this article and give readers an easy next step when they are ready to shop.
- Everyday Plates — Unify color story and keep shelves cohesive.
- Pantry Canisters — Decant packaging to reduce visual noise.
- Closed Bins — Hide unattractive items while staying accessible.
- Books and Art — Add personality and anchor shelf vignettes.
- Warm Texture — Introduce natural texture and balanced weight.