
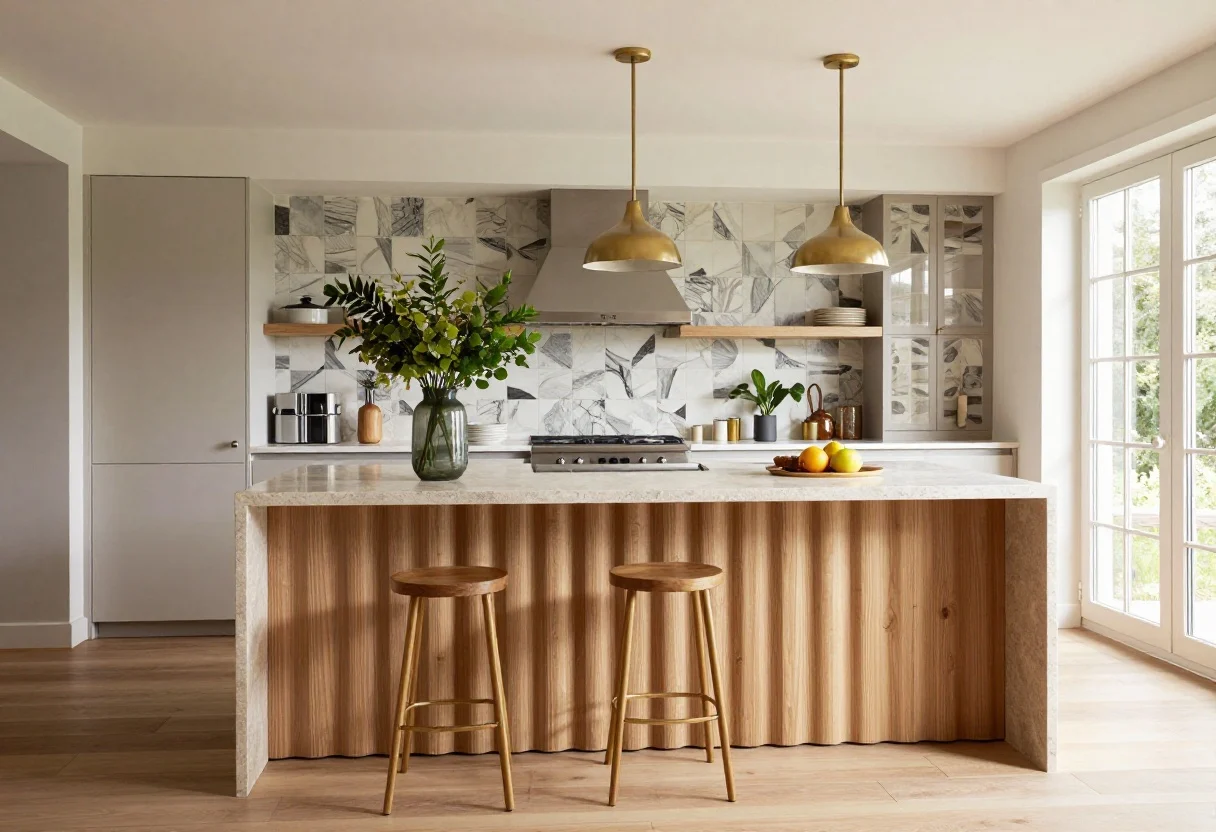
9 Kitchen Island Back Panel Ideas You Haven’t Seen (but Will Want Immediately)
Advertisement

That blank island back panel in your kitchen? It’s prime real estate you’re totally underusing. Let’s turn it from “meh” to “whoa, tell me everything.” These nine ideas are fresh, functional, and surprisingly doable—no full reno required. Ready to make your kitchen island the main character?
1. Textured Plaster With Soft Curves
© 2025 AI Illustrator — Inspiration Only
Flat drywall is fine. But a hand-troweled plaster finish with subtle curves? That’s art. Think Roman clay or limewash with gentle swoops that catch the light and make your island look custom.
Keep it matte and neutral (bone, mushroom, chalk white) for that quiet-luxury vibe. Rounded corners soften the mass of the island and play nicely with modern cabinets.
Pro Tips
- Specify a medium trowel texture so it reads intentional, not patchy.
- Seal with a kitchen-safe protector to resist scuffs and spaghetti night.
- Echo the curve with a rounded toe-kick or arched bar stools.
What to shop for: Mineral plasters, limewash kits, angled trowels, matte sealers.
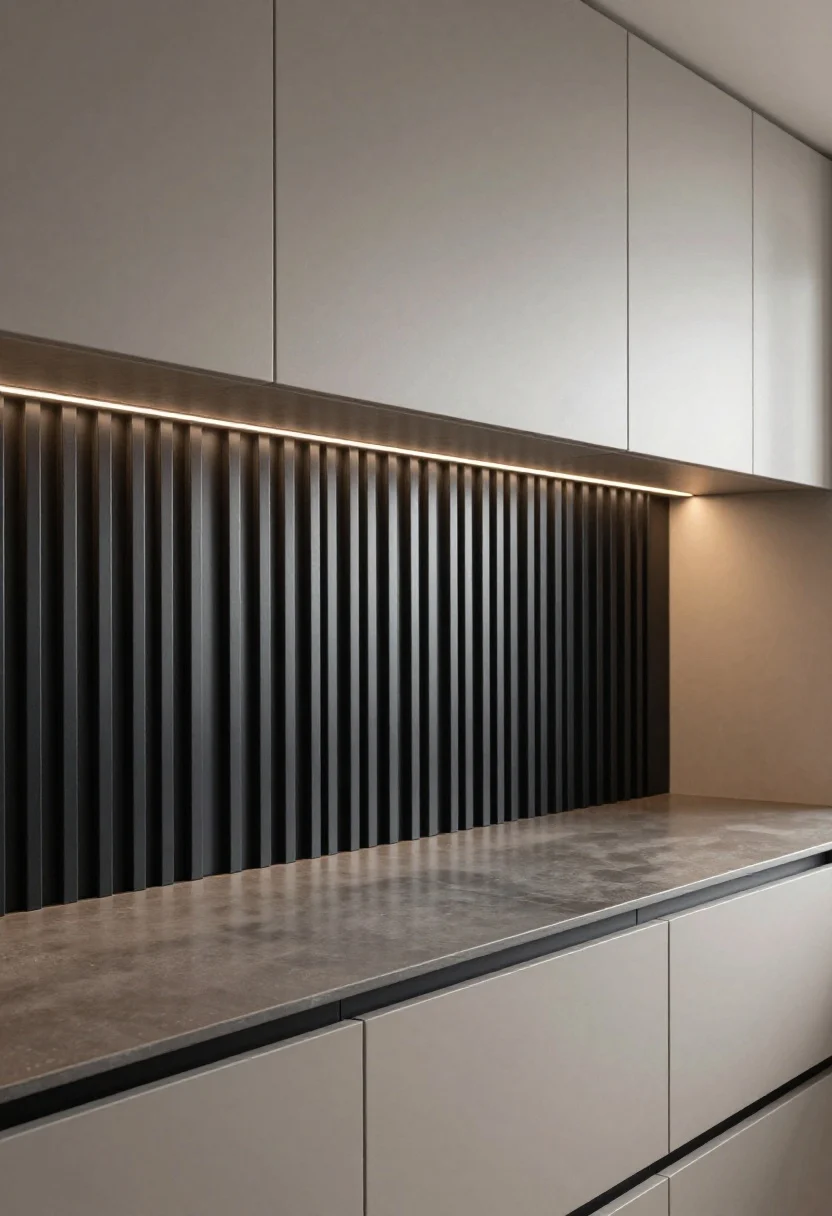
2. Fluted Wood… But Make It Unexpected
© 2025 AI Illustrator — Inspiration Only
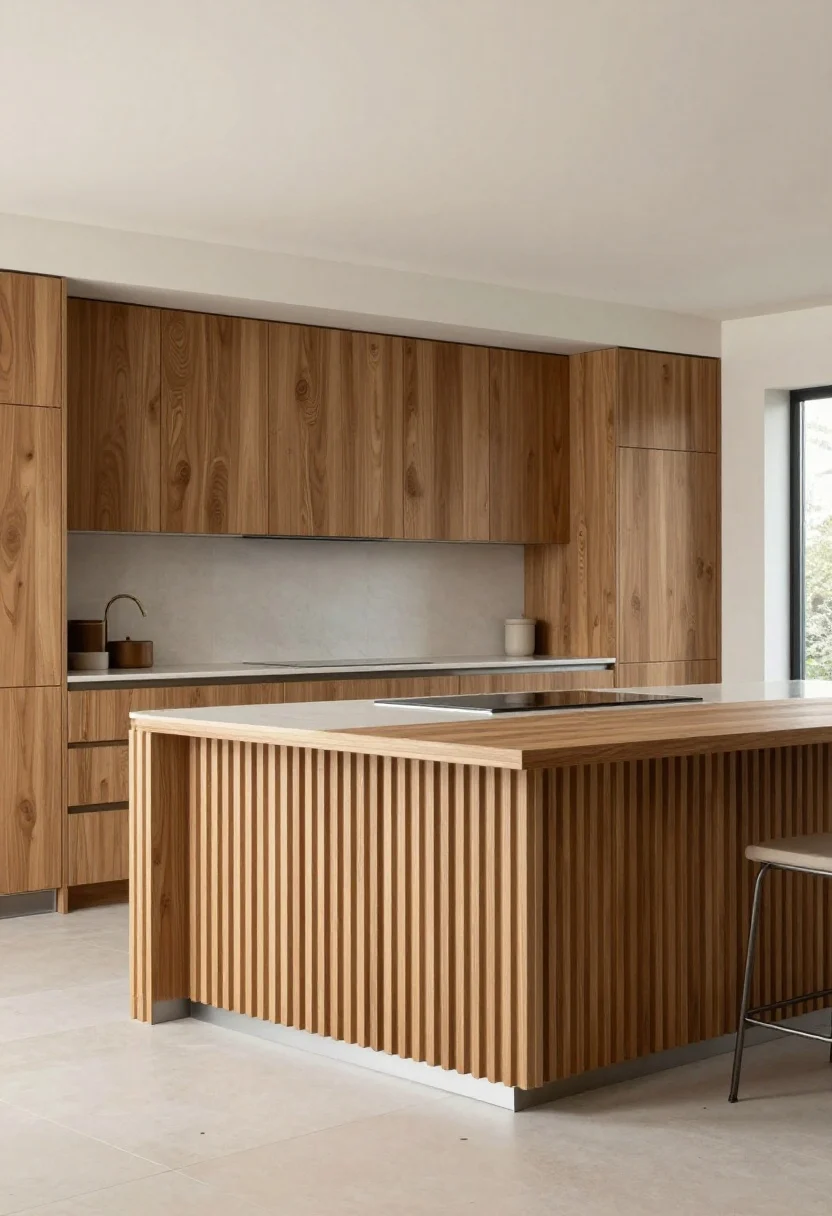
Yes, fluting is everywhere—but flip the script. Try oversized flutes (widely spaced ribs) for a bold, architectural read, or go micro-fluted for subtle texture that looks luxe up close.
Follow our WhatsApp Channel for easy bedroom ideas, small-space tips, storage tricks, and budget decor fixes.
Follow on WhatsAppStain the wood to contrast your cabinets, or paint it the same color for tone-on-tone depth. Bonus: fluting hides the occasional kick mark. You’re welcome.
Pro Tips
- Use half-round dowels or premade fluted panels to save time.
- Run flutes vertically to add height, or horizontally for a fresh, graphic look.
- Add metal edge trim for a clean, finished border.
What to shop for: Fluted wall panels, dowels, edge trim, gel stain, paint-grade MDF.
3. Curated Cork Gallery (Functional + Fun)
Hear me out: a full cork back panel wrapped in a pretty fabric or left natural. It’s a command center disguised as decor. Pin recipes, snapshots, kids’ art, or weekly menus without cluttering the fridge.
Go natural cork for warmth, or cover cork sheets with linen for a tailored look. Frame it like a giant panel so it reads intentional, not dorm room.
Pro Tips
- Use thick cork sheets (at least 1/4 inch) so pins hold well.
- Edge it with oak or brass for a gallery feel.
- Keep the bottom few inches clear to avoid stray kicks.
What to shop for: Cork tiles/sheets, upholstery linen, spray adhesive, trim molding, brass pins.
4. Stone Slab With a Waterfall Illusion
© 2025 AI Illustrator — Inspiration Only
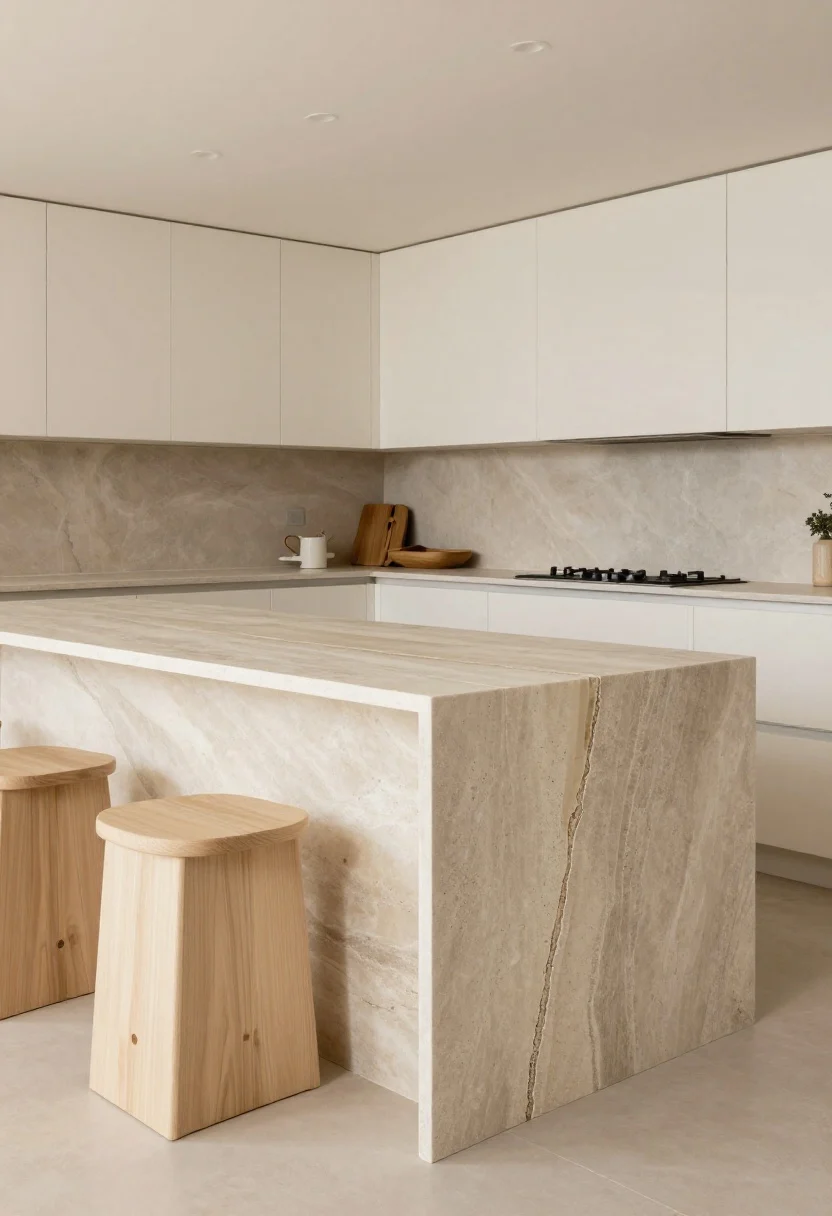
Want drama? Wrap the island’s back in a bookmatched stone slab that visually “falls” from the countertop. It fakes a waterfall edge without paying for two sides—smart and stunning.
Veiny marbles and expressive quartzites do the most, but a honed quartz with minimal veining gives a sleek, Scandi calm. Keep lighting warm to avoid a sterile vibe.
Pro Tips
- Ask for mitered corners at the ends for an uninterrupted look.
- Honed finishes resist fingerprints better than polished—FYI.
- Choose a slab with a big, singular vein to anchor the composition.
What to shop for: Quartz, quartzite, marble slabs, color-matched epoxy, surface sealant.
5. Slatted Metal Screening for Industrial Chic
© 2025 AI Illustrator — Inspiration Only
Think powder-coated metal slats spaced slightly off the panel with hidden standoffs. It’s airy, architectural, and surprisingly family-proof. Go matte black for edge or warm brass for glow.
The mini shadow lines make basic islands look custom. And if your kitchen skews modern farmhouse, this quietly modernizes everything.
Pro Tips
- Use aluminum or steel with a durable powder coat finish.
- Keep spacing consistent—use a jig for pro results.
- Add an LED strip under the counter lip to graze the slats at night. Instant ambiance.
What to shop for: Metal flat bars, standoffs, powder coating services, LED tape lighting.
6. Heritage Tile Mural (But Not Kitcshy)
© 2025 AI Illustrator — Inspiration Only
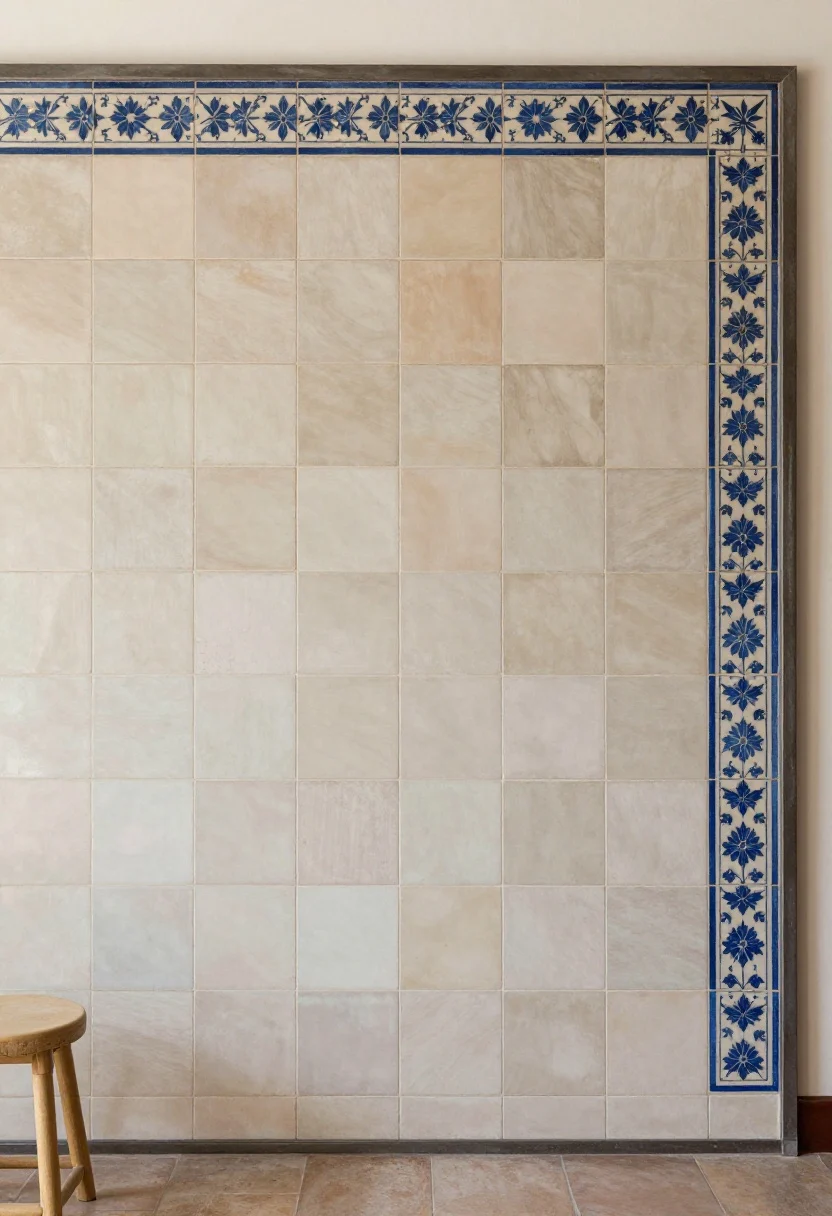
Channel old-world vibes with a tile tableau on the back panel. Mix hand-painted field tiles with a subtle border, or create a gradient using tonal zellige for depth without chaos.
Keep the palette simple—two or three colors—so it feels collected, not “theme restaurant.” Pair with quiet counter stools to let the tile sing.
Pro Tips
- Use honed or satin tiles to hide scuffs and fingerprints.
- Choose a grout color that blends, not shouts.
- Finish edges with a bullnose or metal schluter strip.
What to shop for: Zellige tiles, hand-painted ceramics, schluter trim, grout sealer.
7. Upholstered Panel You Can Lean On
© 2025 AI Illustrator — Inspiration Only
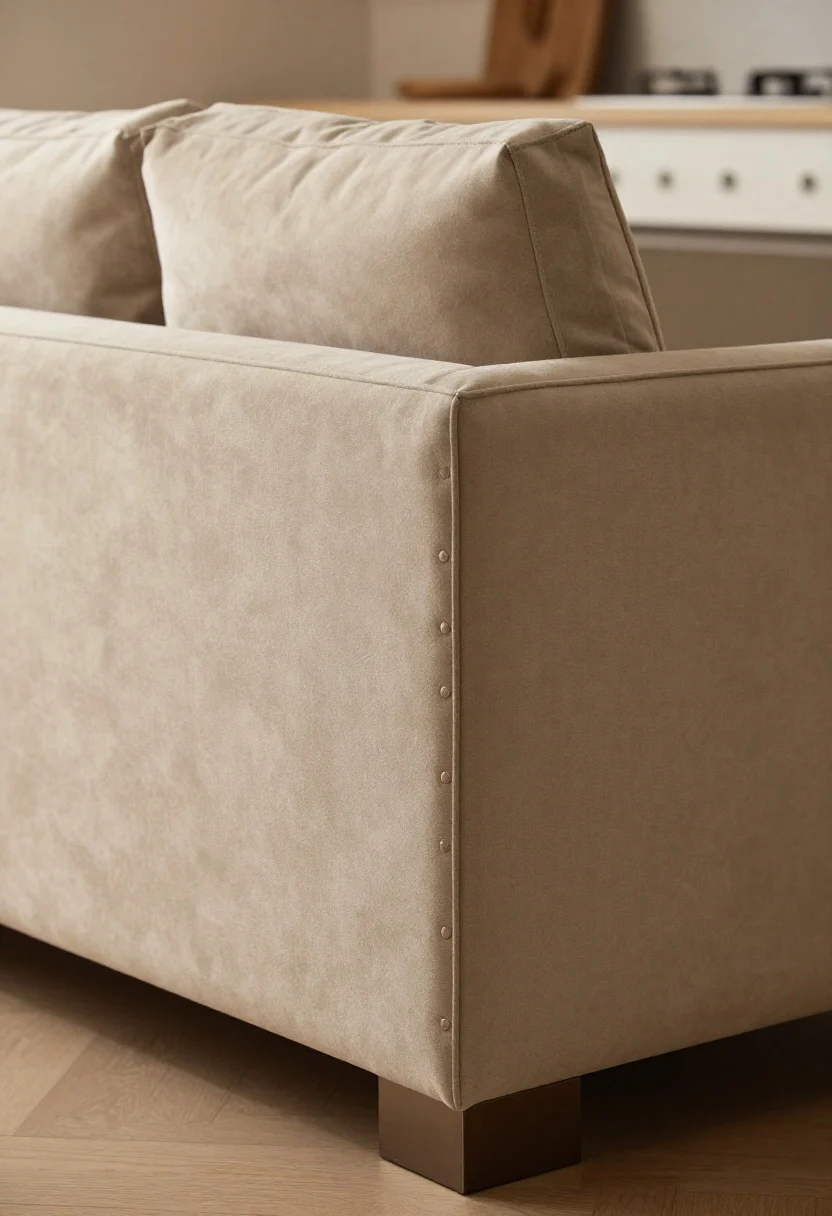
Comfort isn’t just for the sofa. An upholstered island back adds softness, absorbs sound, and looks ridiculously high-end. Go for performance fabric or faux leather that wipes clean after taco night.
Framed upholstery panels look tailored, while channel tufting adds dimension. It’s the perfect counterbalance to all those hard kitchen surfaces.
Pro Tips
- Use marine vinyl or performance fabric rated for high rub counts.
- Add a thin foam and batting layer for cushion, then staple to a backing board.
- Protect lower edges with a kick plate or wood rail to prevent scuffs.
What to shop for: Performance fabric, vinyl, foam batting, staple gun, decorative trim, upholstery nails.
8. Integrated Storage Niches (Goodbye Clutter)
© 2025 AI Illustrator — Inspiration Only
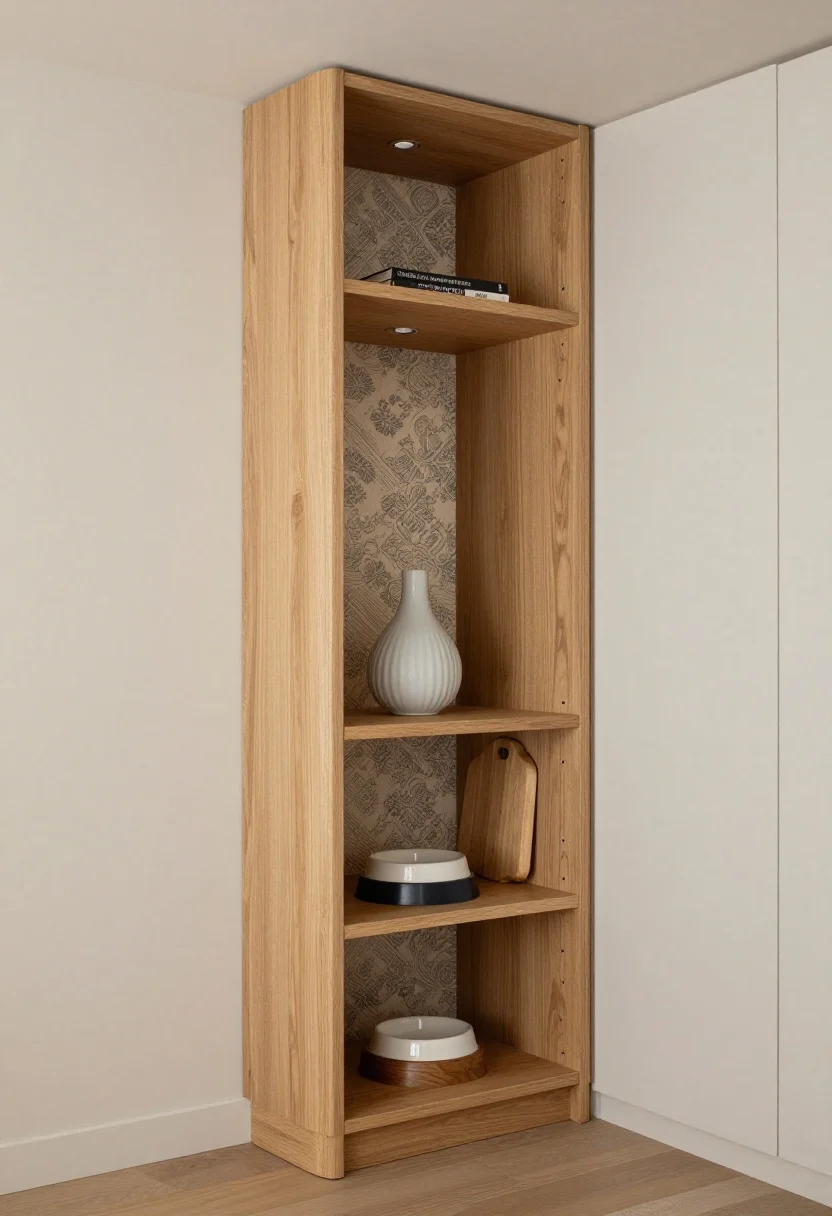
Turn dead space into open niches for cookbooks, serving boards, or even pet bowls. A couple of asymmetrical cubbies make your island look custom and actually useful—IMO, the best combo.
Keep the interiors finished: think contrasting wood, beadboard backs, or patterned wallpaper. Add small puck lights if you want a soft glow at night.
Pro Tips
- Round the internal corners slightly for a furniture-grade feel.
- Line with durable laminate or oak veneer to resist dings.
- Size one niche tall enough for oversized cookbooks or a vase moment.
What to shop for: Cabinet-grade plywood, veneer, edge banding, puck lights, peel-and-stick wallpaper.
9. Mixed-Material Patchwork (Designer-Level, DIY-Friendly)
© 2025 AI Illustrator — Inspiration Only
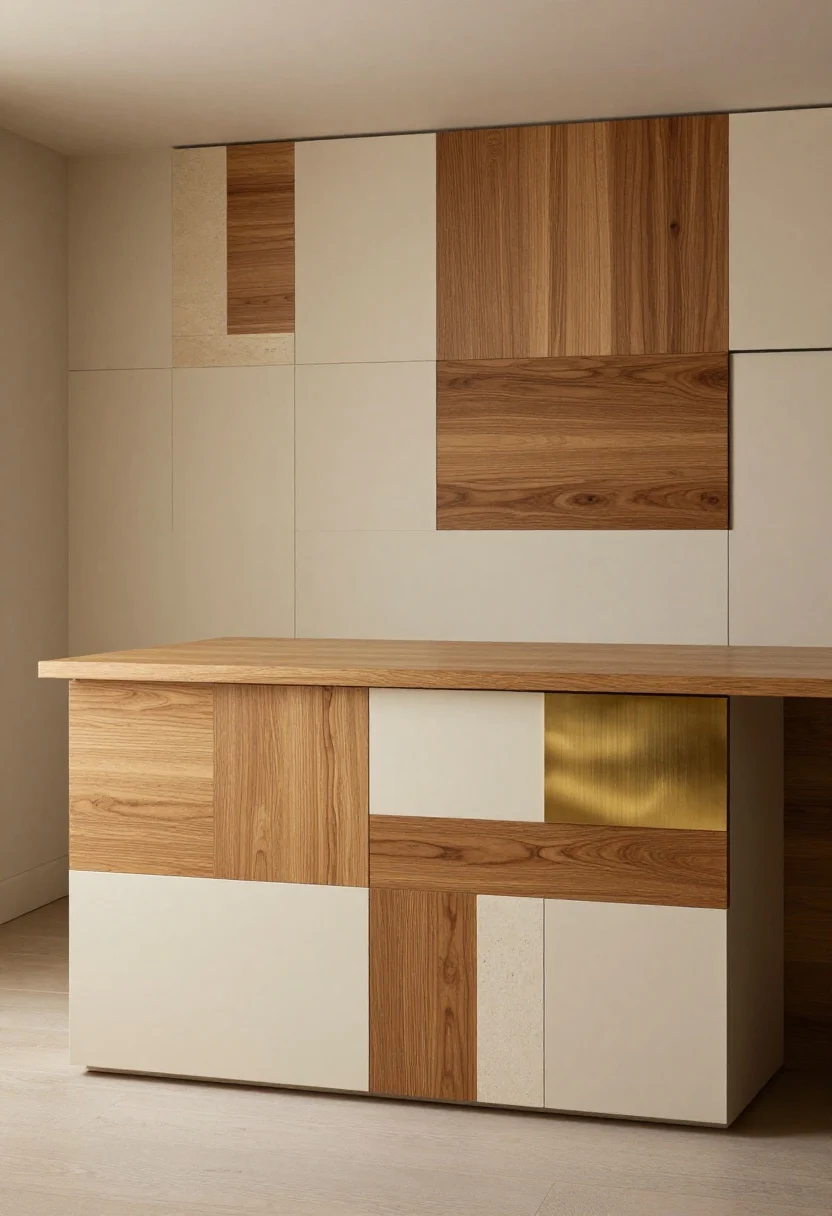
Can’t pick one finish? Don’t. Create a patchwork panel using three to four materials—think narrow strips of oak, painted panels, brushed brass accents, and a sliver of stone. Keep the palette tight so it feels curated, not chaotic.
Lay it out like a puzzle: balance textures, vary strip widths, and repeat elements for rhythm. It’s a showstopper that reads fully custom—without custom prices.
Pro Tips
- Stick to one warm tone family (e.g., oak + brass + cream paint) or one cool family.
- Use a shallow reveal (1/8 inch) between materials for a crisp shadow line.
- Finish everything in the same sheen level for cohesion.
What to shop for: Oak veneer, brass angle trim, paint panels, thin stone offcuts, construction adhesive.
Design Details That Make Any Idea Better
- Scale: Large patterns or wide flutes feel calmer than fussy small ones.
- Edges: Always finish with trim, mitered corners, or color-matched caulk.
- Lighting: A discreet LED strip under the counter lip elevates every material—especially texture.
- Durability: Choose wipeable finishes where feet kick and barstools live.
Quick Planning Checklist
- Measure your overhang and barstool clearance before adding dimension.
- Confirm access panels for outlets or plumbing if needed.
- Order 10–15% extra material for cuts and pattern matching.
- Test finishes in your actual light—day and night can be very different.
Style Pairings You’ll Love
- Modern minimal: Oversized flutes, honed quartz slab, matte black stools.
- Warm European: Limewash plaster, brass rail, wood counter stools with rush seats.
- Eclectic cozy: Tile mural, mixed-material patchwork, layered textiles and art.
Bottom line: your island’s back panel is not a blank. It’s a statement wall hiding in plain sight. Pick one idea, add great lighting, and watch your kitchen glow up—no sledgehammer needed.
FAQ
Q: What’s the most durable option if I have kids and pets?
A: Go for honed quartz or quartzite slabs, powder-coated metal slats, or performance vinyl upholstery with a protective lower rail. They wipe clean and shrug off scuffs.
Q: Can I DIY these, or do I need a pro?
A: Many are DIY-friendly—fluted panels, cork, niches, and patchwork panels—if you’re handy and have basic tools. Stone slabs and complex electrical lighting are best left to pros for safety and clean seams.
Q: How do I choose a color that won’t date fast?
A: Keep the panel tonal with your cabinets or counters—think layered neutrals with texture. If you want color, pick muted, mineral tones (sage, clay, ink blue) rather than high-saturation shades for longevity.
You’ve got nine fresh plays—now pick your fave, grab a weekend, and give that island a glow-up it deserves.
Shop the Look on Amazon
Disclosure: As an Amazon Associate, this site may earn from qualifying purchases.
These product categories fit this article and give readers an easy next step when they are ready to shop.
- Textured plaster — For curved, matte island finishes with sealed durability.
- Fluted wood — Create oversized or micro flutes to hide scuffs.
- Cork gallery — Pin recipes and art while adding warm texture.
- Stone wrap — Waterfall illusion with low-glare, durable surface.
- Metal screening — Industrial texture with shadow lines and durability.
2 Comments
Comments are closed.