
Landscape Lighting Ideas for Nighttime Magic You’ll Want Tonight

Ready to make your yard look like a boutique hotel after dark? Good. Because a few smart lights can turn “meh” landscaping into a total mood. We’re talking glowing paths, drama on the trees, and that cozy, can’t-wait-to-sit-outside vibe. Grab a drink, step outside, and let’s plan your nighttime magic show.
1. Glow Up The Path (Without Airport Runway Vibes)
© 2025 AI Illustrator — Inspiration Only
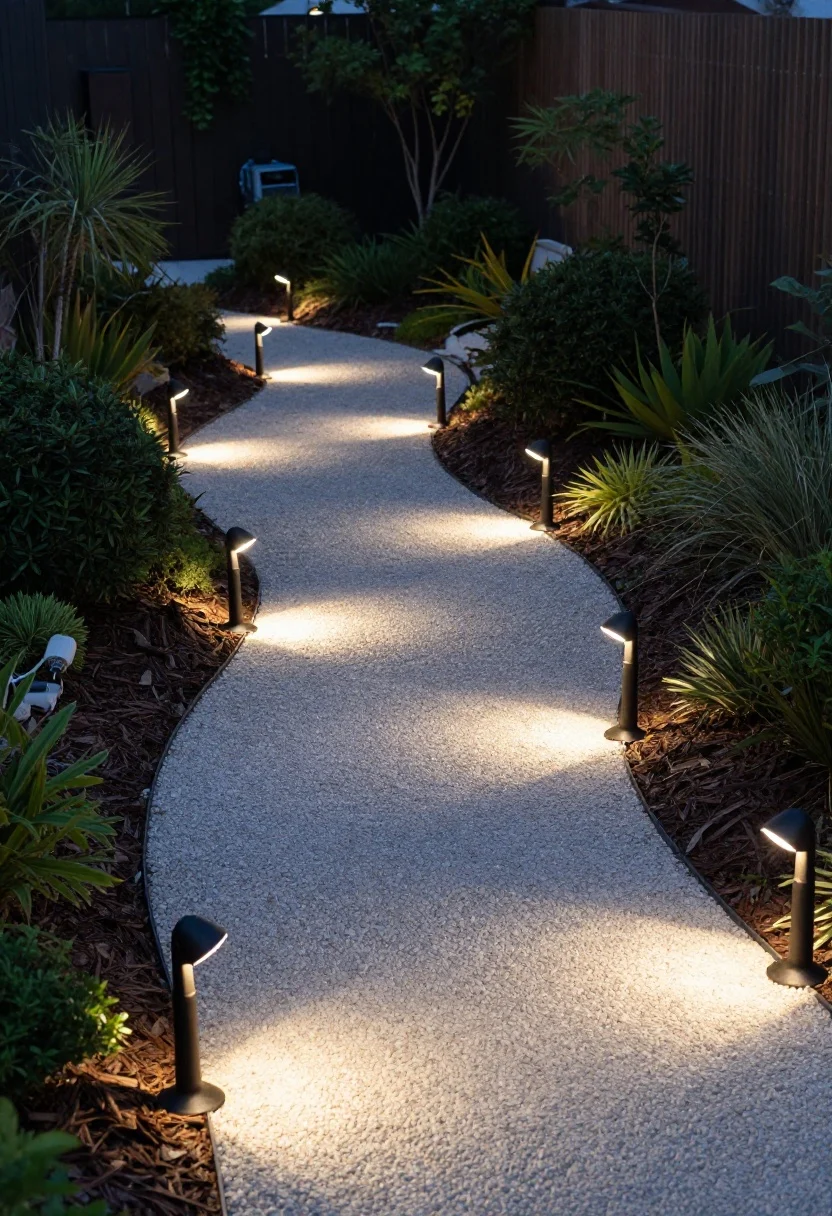
Nothing says “welcome” like a softly lit path. The trick is low, warm lighting that guides your feet—not a blinding line of UFO beacons. Space fixtures so the light overlaps gently, and aim them down to avoid glare.
Pro Tips
- Stagger, don’t soldier. Place path lights on alternating sides for a natural rhythm.
- Mind the temperature. Warm white (2700K–3000K) keeps it cozy, not clinical.
- Keep it low. Short stakes look more refined and reduce light pollution.
What to shop for: Path lights, low-voltage transformers, outdoor-rated LED bulbs.
2. Uplight The Drama: Trees, Sculptures, And Stone
© 2025 AI Illustrator — Inspiration Only
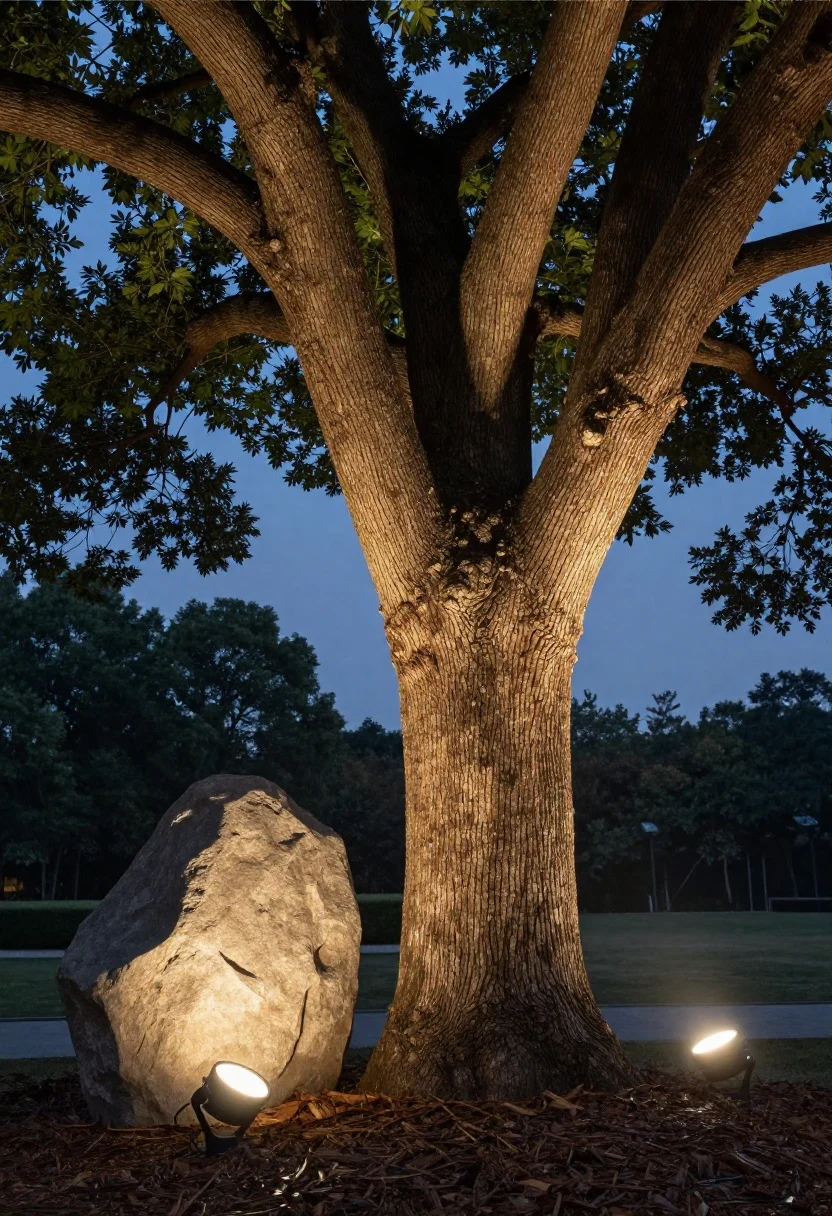
Want instant “wow”? Uplighting is your MVP. Aim small spotlights at trunks, architectural features, or that statue you swore you’d appreciate more in the daylight. The upward throw carves out texture and height like a pro stylist.
Pro Tips
- Choose the beam wisely. Narrow beams for tall, narrow trees; wider beams for fuller canopies or walls.
- Angle to avoid glare. Tuck fixtures low and slightly forward so you see glow, not bulbs.
- Layer intensity. Use brighter output on statement trees and softer light on supporting players.
What to shop for: In-ground well lights, adjustable spotlights, glare shields.
3. Moonlight From Above For Instant Enchantment
© 2025 AI Illustrator — Inspiration Only
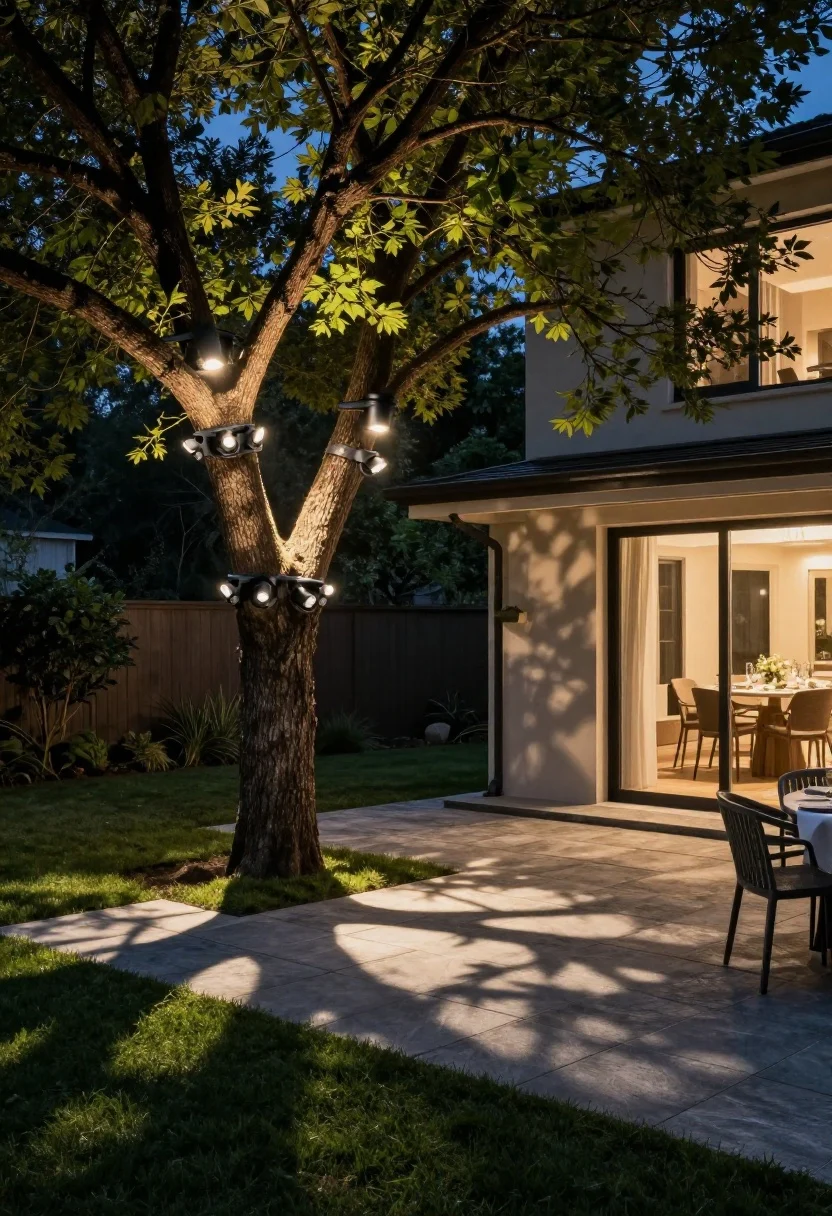
Want that soft, silvery “the moon loves my backyard” look? Mount downlights high in trees or under eaves and aim through branches. The dappled shadows are subtle, romantic, and very “I host gorgeous dinner parties now.”
Pro Tips
- Go high and soft. The higher the fixture, the gentler the spread. Keep lights dim and warm.
- Let leaves do the work. Light filtering through foliage creates natural shadow play.
- Use tree-friendly mounts. Brackets with growth room protect your trees and future you.
What to shop for: Downlights, tree-mount brackets, waterproof connectors.
4. Highlight Water: Shimmer, Sparkle, Repeat
© 2025 AI Illustrator — Inspiration Only
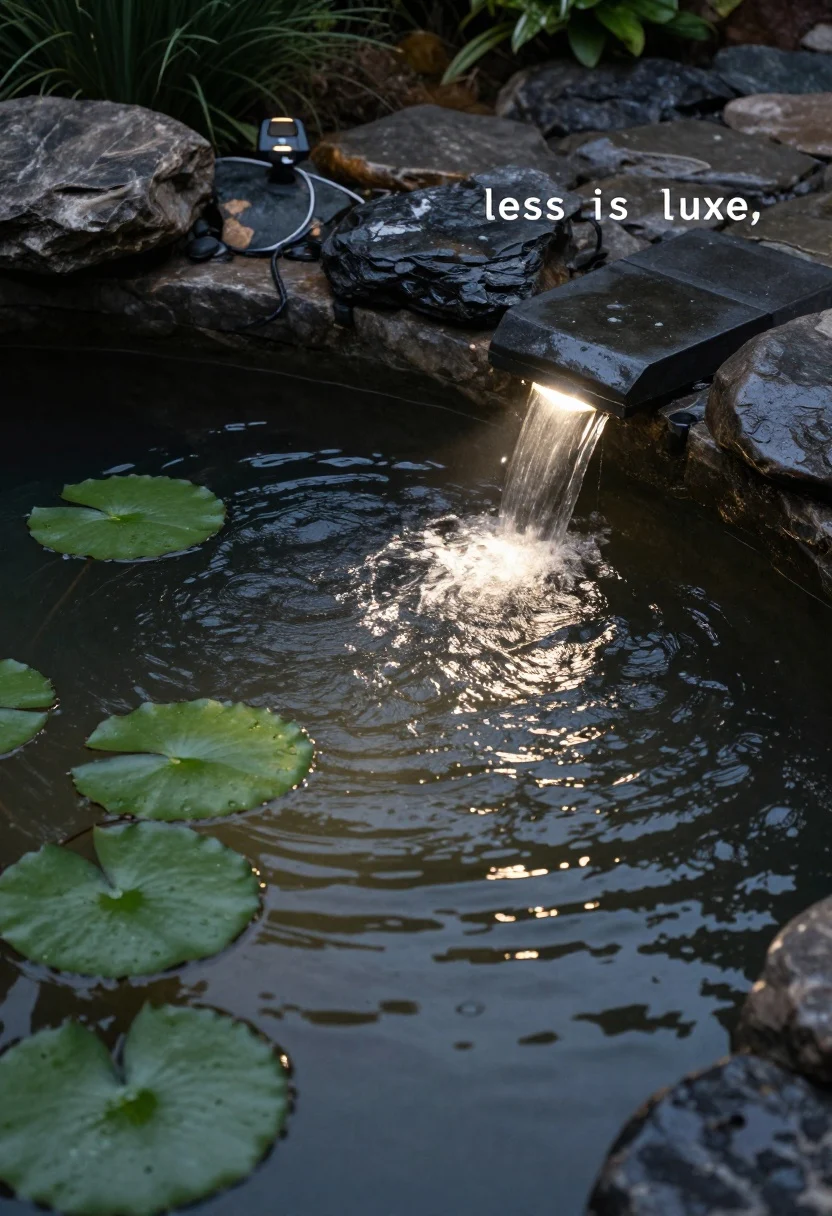
Ponds, fountains, and pools basically beg for lighting. Aim a soft spotlight across water to catch ripples, or tuck submersible lights under a spillway. It’s instant spa energy, minus the robe.
Pro Tips
- Side-light, not front-light. Grazing across the surface shows texture without glare.
- Keep it safe. Use low-voltage, outdoor-rated, and for submersible, IP68-rated fixtures. Safety first, sparkle second.
- Less is luxe. One or two well-placed lights beat a glowing aquarium look, IMO.
What to shop for: Submersible pond lights, waterproof spotlights, pool-rated LEDs.
5. Grazing And Washing: Make Walls And Paths Pop
© 2025 AI Illustrator — Inspiration Only
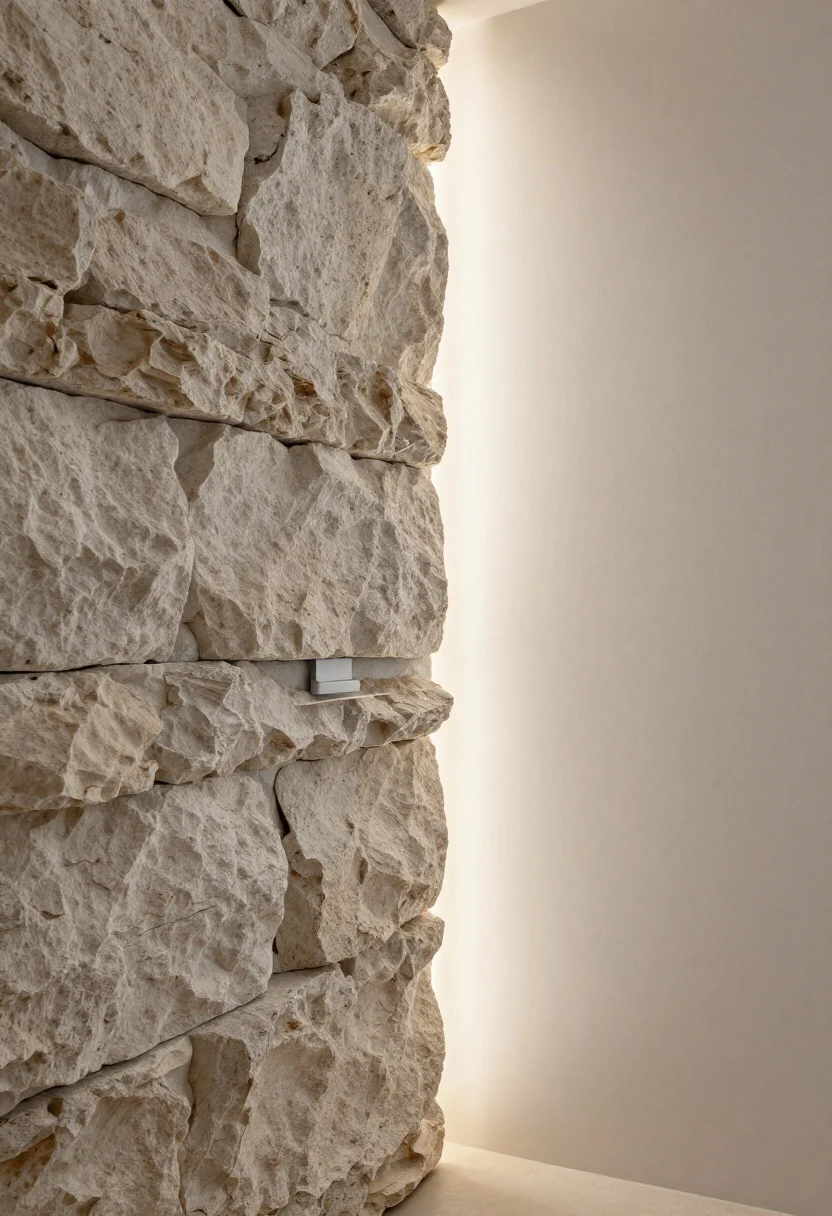
Texture is everything at night. “Grazing” runs light close along a surface to pull out all those stone and wood details; “washing” spreads a soft glow that smooths things out. Use both strategically to frame seating areas or draw attention to your home’s best angles.
Pro Tips
- Grazing = drama. Mount fixtures tight to rough surfaces like stone to emphasize depth.
- Washing = calm. Place floodlights farther out for even illumination over stucco or hedges.
- Blend beams. Overlap edges slightly for a seamless look—no bright “hot spots.”
What to shop for: Linear wall grazers, wide-beam floodlights, shielded wall lights.
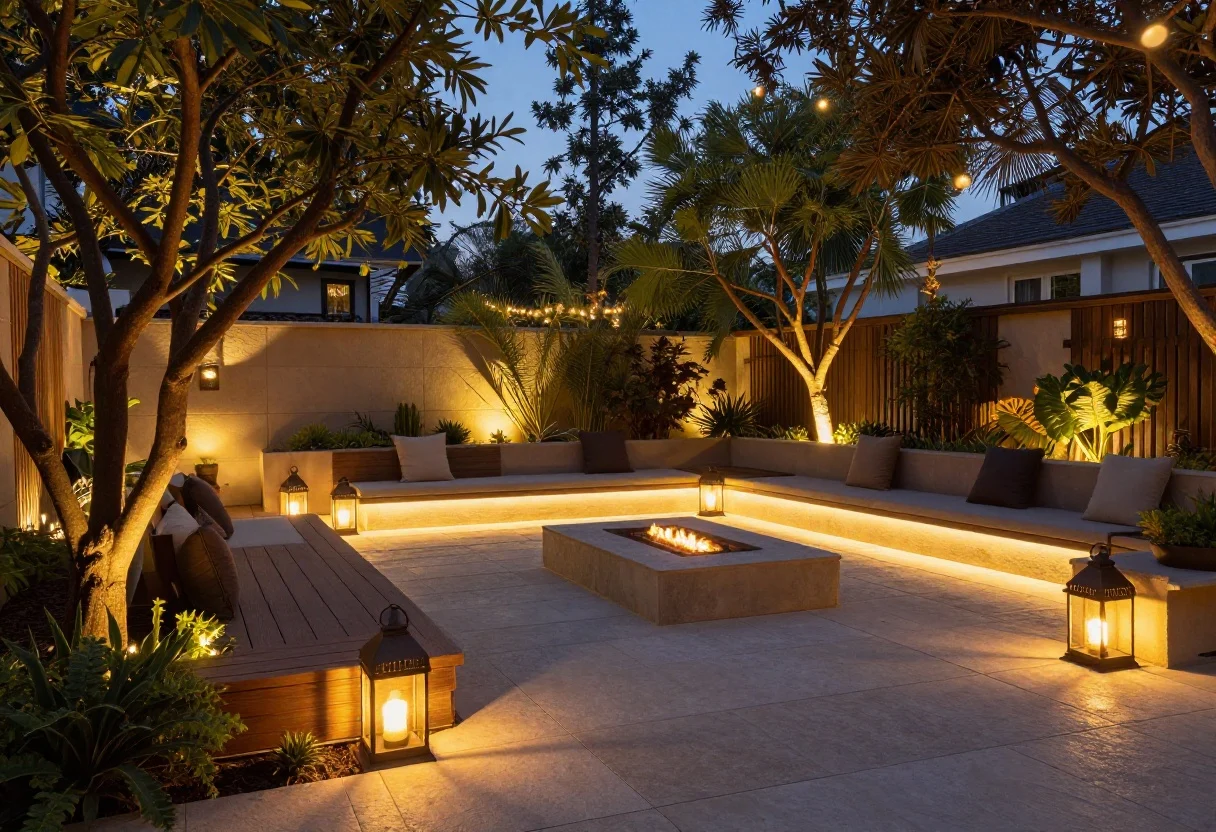
6. Cozy Up Zones: Decks, Steps, And Seating
© 2025 AI Illustrator — Inspiration Only
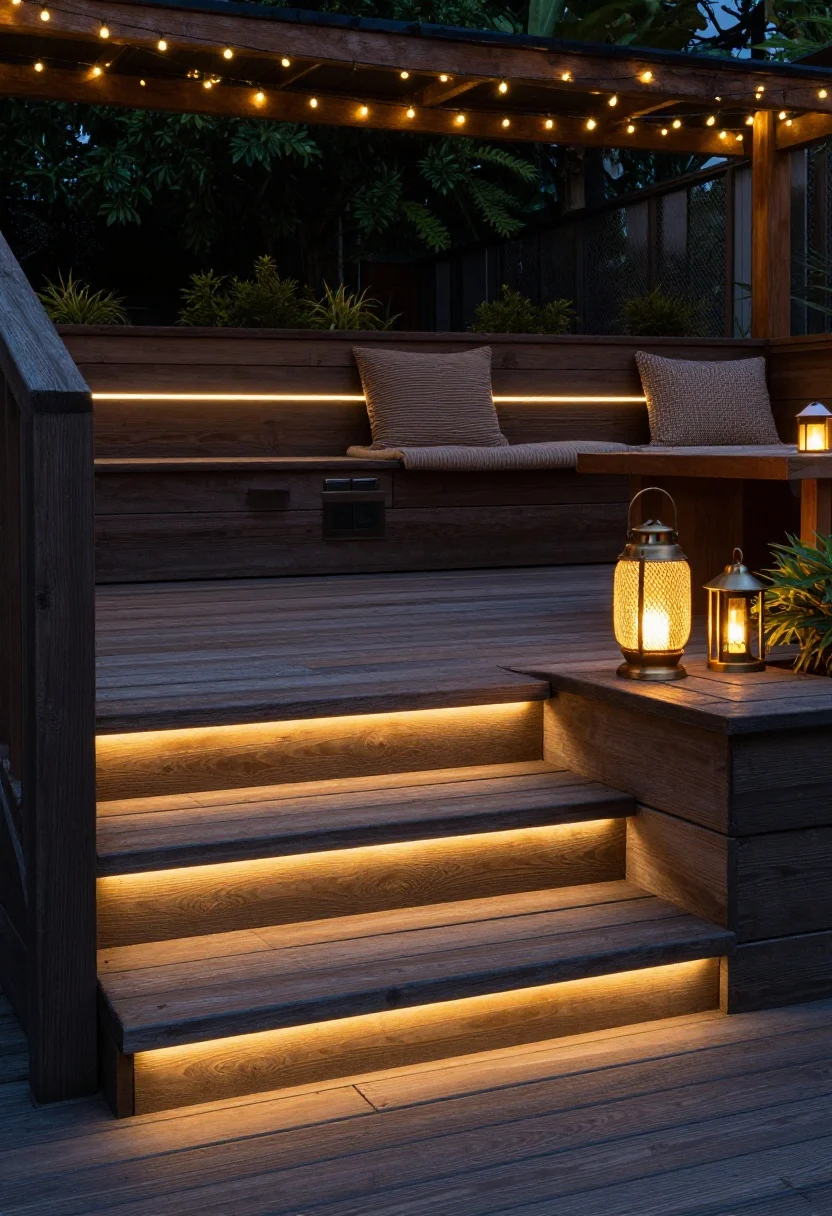
Outdoor hangouts deserve flattering light. Think under-rail LEDs along a deck, tiny step lights for safety, and a cluster of warm lanterns around seating. It’s like contouring for your backyard—subtle, but it makes everything look better.
Pro Tips
- Under, not over. Hide fixtures under rails, benches, or stair lips for glow without glare.
- Mind the eyes. Step lights should illuminate treads, not blind guests mid-toast.
- Mix heights. Table lanterns + low deck lights + soft overhead string lights = layered magic.
What to shop for: Deck and step lights, weatherproof string lights, rechargeable outdoor lanterns.
7. Smart Controls: Set The Mood (And Forget It)
© 2025 AI Illustrator — Inspiration Only
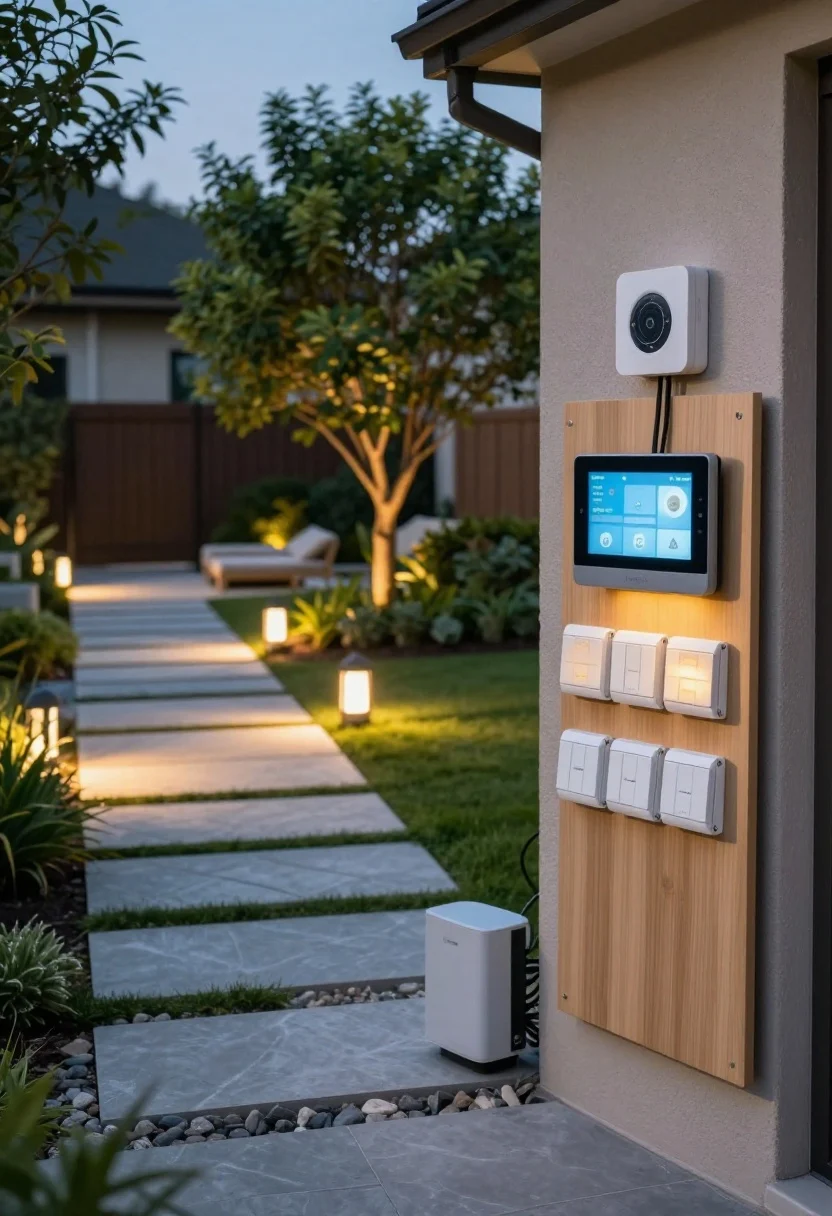
Lighting that runs on autopilot? Yes, please. Timers, photocells, and smart hubs keep everything efficient and perfectly timed. Add dimmers or scenes so you can switch from “pathway bright” to “cocktail glow” in one tap, FYI.
Pro Tips
- Layer circuits. Put paths, features, and seating zones on separate controls for flexibility.
- Use warm presets. If you have tunable fixtures, set evening scenes to 2700K–3000K.
- Don’t forget maintenance. Schedule a quarterly check for aim, plant overgrowth, and lens cleaning.
What to shop for: Outdoor smart switches, low-voltage transformers with timers, dimmers, photocells.
Design Flow That Works Every Time
- Start at the door. Light the entry, then paths, then features.
- Choose a hero. One or two focal points per view—big tree, water, architectural moment.
- Mind the neighbors. Shield fixtures to keep light on your yard, not in their windows.
Quick Planning Checklist
- Sketch your yard and mark paths, trees, walls, water, and seating.
- Decide on warm color temperature and consistent finish (black, bronze, or stainless).
- Pick low-voltage for most projects; solar for accents only.
- Map wiring runs, transformer location, and control zones.
- Test at night before final mounting. Adjust angles and brightness after dark.
Common Mistakes To Avoid
- Too bright, too high. Keep fixtures low and outputs modest for elegance.
- Spotlight overload. Mix path, wash, and downlight for balance.
- No plan for growth. Plants get bigger—leave room to re-aim and reposition lights.
Bottom line: Nighttime magic is all about layering warm, subtle light in the right places. Start simple, add a few showstoppers, and control the whole thing like the lighting director you are.
FAQ
Q: Are solar lights worth it?
A: For accents and short paths, yes. For consistent, year-round brightness and control, low-voltage wired beats solar every time.
Q: What color temperature looks best outside?
A: Warm white, 2700K–3000K. It flatters skin, softens materials, and feels inviting instead of harsh.
Q: How many lumens do I need?
A: Rough guide: 100–200 lumens for path lights, 200–400 for wall washing, 300–600 for uplighting medium trees. Always test at night and dim as needed.
You’ve got this. Start with the path and one focal point, then build out. By next weekend, your backyard will be the after-dark hangout everyone texts about.
Shop the Look on Amazon
Disclosure: As an Amazon Associate, this site may earn from qualifying purchases.
These product categories fit this article and give readers an easy next step when they are ready to shop.
- Path Lighting — Guides walkways with warm, low glare illumination.
- Uplighting — Adds drama to trees, sculptures, and facades.
- Moonlighting — Creates soft, dappled light from above.
- Water Features — Highlights ripples and spillways safely and subtly.
- Smart Controls — Automates timers, dimming, and scene settings.

One Comment
Comments are closed.